Tuesday, August 31, 2010
Spinach-Chickpea Burgers
I'm always on the lookout for good vegetarian dishes, for health reasons, and because I want to reduce my carbon footprint by reducing the amount of meat I consume. But it's more than just trying to do good by my body and my planet-I love vegetables! There are a lot of soy burgers out there, but I like veggie burgers that taste like vegetables, not try to imitate meat. I'm a dedicated NPR geek, and one of my favorite shows is The Splendid Table, where I got this recipe. I'm also a cookbook collector, and after making these delicious burgers from Veggie Burgers Every Which Way, I'll surely be adding it to my collection. These burgers are satisfying, but not heavy, and delightfully smoky from the cumin. Chickpeas and spinach are a sure-fire combination and are paired simply, but perfectly, in this burger.
I divided this recipe into four burgers instead of five, because I was cooking for two and this makes a dinner and lunch with no leftovers. This recipe says to transfer the burgers to the oven to bake, but doesn't give a temperature. I baked my burgers at 350 degrees F for between 10 and 12 minutes, although I suspect my oven may run a bit hotter than the temperature I set it to. You want to make sure the egg is thoroughly cooked and the burgers are set, and there is more than one set of baking conditions that can accomplish that, so just keep an eye on them as the bake in the oven.
Spinach-Chickpea Burgers
from The Splendid Table, who excerpted it from Veggie Burgers Every Which Way
Makes five 4-inch burgers
This is one of my favorite veggie burgers. It has everything I want: hearty chickpeas, fortifying spinach, a hint of nutty toasted cumin seeds, and final finish of fresh lemon. It’s also very easy! As with most burgers in this book, be sure to reserve a portion of the beans and mash them by hand, rather than blitzing all of them in the food processor, as this gives the burger texture. I like to serve them accompanied by traditional burger fixings: lettuce, tomato, and mustard.
2 tablespoons plus 1 teaspoon olive oil
1 teaspoon toasted cumin seeds
5 ounces fresh spinach
1 1/2 cups cooked chickpeas
2 eggs
Juice of 1/2 lemon
1 teaspoon salt
1/3 cup chickpea flour (see note), or more if needed
1. Heat 1 teaspoon of the oil in a medium skillet. Add the cumin seeds and spinach and cook, tossing with tongs, until the spinach is completely wilted, 2 or 3 minutes. Transfer to a heatproof plate and allow to cool until safe to handle. Drain if necessary, wrap in a towel, and squeeze out as much liquid as possible. Chop finely.
2. Combine 1 1/4 cups of the chickpeas, the eggs, lemon juice, and salt in a food processor. Pulse until the mixture resembles a chunky hummus.
3. In a large bowl, combine the spinach with the remaining 1/4 cup beans and mash coarsely with a potato masher. Add the bean-egg mixture and stir thoroughly. Fold in the chickpea flour. The mixture should be sticky but somewhat pliable. Add more flour, 1 teaspoon at a time, if too wet, or a bit of water if too dry. Shape into 5 patties.
4. In an oven-safe skillet or nonstick sauté pan, heat the remaining 2 tablespoons oil over medium-high heat. When hot, add the patties and cook until browned on each side, 6 to 10 minutes total. Transfer the pan to the oven and bake for 12 to 15 minutes, until the burgers are firm and cooked through.
Note: While it’s easy to make your own chickpea flour by grinding dried chickpeas in a spice grinder or blender, it can now be found at most grocery stores — but at a hefty price. It’s a standard ingredient in Indian cuisines, used to make a breading batter for pakoras and in some flatbreads, and can thus be found readily and less expensively at Indian groceries, where it is sometimes called gram flour.
Monday, August 30, 2010
Beaten Biscuits
I made these biscuits simply because I needed something to go with Summer Corn Soup, I've yet to be disappointed with a Good to the Grain recipe, and I already had everything I needed at home. These biscuits are wonderfully nutty and tender, and are delicious topped simply with butter or jam, or dipped into the delicate sweetness and freshness of Summer Corn Soup. These biscuits have a much more complex flavor and interesting texture than those made with white flour, although not everyone will prefer whole-grain biscuits. As with all biscuits, they're never as good as they are fresh out of the oven, but were still a treat the next day with leftover soup. I tried freezing a couple to see how they hold up, but obviously won't know for a while how well they survive in the freezer.
Beaten Biscuits
from Good to the Grain by Kim Boyce
I first tasted beaten biscuits in Kentucky. In the era before baking powder and baking soda, biscuit dough was beaten for long periods of time to give the biscuits lift. Contrary to what I had always thought-that the dough required a light hand to yield a tired biscuit-these biscuits are beaten and folded repeatedly and yet the results are very tender. Here I kept the method, using a bit of chemical leavening with the multigrain flour mix-I didn't quite believe that I would get the lift without it.
These biscuits are small, with a fine, crumbly texture. The homemade multigrain flour mix gives them a pure, sweet, and nutty taste. They are particularly good slathered with Three-Citrus Marmalade (see Good to the Grain; p. 192). The rounds of biscuit dough also make a great topping for a fruit cobbler.
Butter for the pans
Dry Mix:
1 c. Multigrain Flour Mix (see recipe below)
1 c. whole-grain pastry flour
1 T. baking powder
1 T. sugar
3/4 t. kosher salt
1/2 t. baking soda
Wet Mix:
3 oz. (3/4 stick) cold, unsalted butter, cut into 1/2-inch pieces
3/4 c. heavy cream
1. Place two racks in the upper and lower thirds of the oven and preheat to 400 degrees F. Rub two baking sheets with butter.
2. Sift the dry ingredients into a large bowl, pouring back into the bowl any bits of grain or other ingredients that may remain in the sifter. Add the butter to the dry mixture. Rub the butter between your fingers, breaking it into smaller and smaller bits until the pieces are the size of grains of rice. The more quickly you do this, the more the butter will stay solid, which is important for the success of the recipe.
3. Add the cream. Working from the outer edge of the flour, draw your hands around the bowl to mix the cream into the flour. Mix the dough until it just holds together.
4. Dust a work surface with flour. Use a pastry scraper or a spatula to transfer the dough to the work surface. With a rolling pin, give the dough three good whacks, then fold the dough over and give it three more good whacks. Fold and whack five more times. Flour as needed.
5. Gather the dough into a ball and roll it out to a 3/4-inch thickness. Using a 2-inch round cookie cutter, cut the dough into circles, punching the circles out as close as possible to one another. Gather the excess dough, roll it out again, and punch out more circles. Repeat until all the dough is used, keeping in mind that the more times you reroll the dough, the tougher the biscuits will be.
6. Transfer the biscuits to the prepared baking sheets, leaving about 3 inches between them.
7. Bake for 18 to 20 minutes, rotating the pans halfway through. The biscuit tops should be a matte mahogany-brown.
8. Enjoy warm, or even a few hours later. Like all biscuits, they're best eaten the day they're made but will keep in an airtight container for 2 days.
Multigrain Flour Mix:
1 c. whole-wheat flour
1 c. oat flour
1 c. barley flour
1/2 c. millet flour
1/2 c. rye flour
Beaten Biscuits
from Good to the Grain by Kim Boyce
I first tasted beaten biscuits in Kentucky. In the era before baking powder and baking soda, biscuit dough was beaten for long periods of time to give the biscuits lift. Contrary to what I had always thought-that the dough required a light hand to yield a tired biscuit-these biscuits are beaten and folded repeatedly and yet the results are very tender. Here I kept the method, using a bit of chemical leavening with the multigrain flour mix-I didn't quite believe that I would get the lift without it.
These biscuits are small, with a fine, crumbly texture. The homemade multigrain flour mix gives them a pure, sweet, and nutty taste. They are particularly good slathered with Three-Citrus Marmalade (see Good to the Grain; p. 192). The rounds of biscuit dough also make a great topping for a fruit cobbler.
Butter for the pans
Dry Mix:
1 c. Multigrain Flour Mix (see recipe below)
1 c. whole-grain pastry flour
1 T. baking powder
1 T. sugar
3/4 t. kosher salt
1/2 t. baking soda
Wet Mix:
3 oz. (3/4 stick) cold, unsalted butter, cut into 1/2-inch pieces
3/4 c. heavy cream
1. Place two racks in the upper and lower thirds of the oven and preheat to 400 degrees F. Rub two baking sheets with butter.
2. Sift the dry ingredients into a large bowl, pouring back into the bowl any bits of grain or other ingredients that may remain in the sifter. Add the butter to the dry mixture. Rub the butter between your fingers, breaking it into smaller and smaller bits until the pieces are the size of grains of rice. The more quickly you do this, the more the butter will stay solid, which is important for the success of the recipe.
3. Add the cream. Working from the outer edge of the flour, draw your hands around the bowl to mix the cream into the flour. Mix the dough until it just holds together.
4. Dust a work surface with flour. Use a pastry scraper or a spatula to transfer the dough to the work surface. With a rolling pin, give the dough three good whacks, then fold the dough over and give it three more good whacks. Fold and whack five more times. Flour as needed.
5. Gather the dough into a ball and roll it out to a 3/4-inch thickness. Using a 2-inch round cookie cutter, cut the dough into circles, punching the circles out as close as possible to one another. Gather the excess dough, roll it out again, and punch out more circles. Repeat until all the dough is used, keeping in mind that the more times you reroll the dough, the tougher the biscuits will be.
6. Transfer the biscuits to the prepared baking sheets, leaving about 3 inches between them.
7. Bake for 18 to 20 minutes, rotating the pans halfway through. The biscuit tops should be a matte mahogany-brown.
8. Enjoy warm, or even a few hours later. Like all biscuits, they're best eaten the day they're made but will keep in an airtight container for 2 days.
Multigrain Flour Mix:
1 c. whole-wheat flour
1 c. oat flour
1 c. barley flour
1/2 c. millet flour
1/2 c. rye flour
Sunday, August 29, 2010
Summer Corn Soup
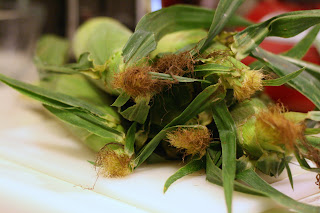
Sadly, fresh sweet corn is just about done for the year. As sad as I am that sweet corn season is nearly over, the arrival of sweet potatoes, apples, and winter squash has me excited for the fall. In a last farewell to summer, I decided to make Summer Corn Soup. Although it was a steamy day, the time and effort spent slaving over the stove was well worth it for the subtle, delightful soup that perfectly features the pure essence of sweet corn and embodies the spirit of hot summer days. This soup is good hot, room temperature, and I bet would even be delightful chilled on a hot day such as today.
After blending the soup I did not pass it through a strainer, as I liked the texture the tiny little pieces of corn kernel add to the soup. I also completely forgot about adding crème fraîche garnish, which I was going to substitute with sour cream, since I already had it on hand. The soup doesn't need the additional enrichment, although I can't imagine it would do the soup a disservice. The soup is subtle and fresh; if you want a more distinctive flavor I would recommend adding chopped jalapeno, poblano, or other favorite pepper either as a garnish, or cooked with the rest of the vegetables.
Summer Corn Soup
from Bon Appetit
Soup:
3 cups whole milk
3 ears of fresh corn, kernels cut from cobs, cobs broken in half and reserved
2 tablespoons (1/4 stick) butter
1 large onion, chopped
1 large carrot, peeled, thinly sliced
1 celery stalk, thinly sliced
1 garlic clove, pressed
2 cups water
2 large fresh thyme sprigs
2 fresh rosemary sprigs
1 bay leaf
Ground white pepper
Garnish:
2 thick bacon slices, diced
1/3 cup fresh corn kernels cut from about 1/2 ear of corn
1 green onion, thinly sliced
Pinch of cayenne pepper
Crème fraîche*, stirred to loosen
Soup:
1. Bring milk and corncob halves (not kernels) just to boil in heavy medium pot. Remove from heat, cover, and let steep while sautéing vegetables.
2. Melt butter in large saucepan over medium heat. Add onion; sprinkle with salt and sauté until translucent, about 5 minutes (do not let onion brown). Add corn kernels, carrot, celery, and garlic; cook until vegetables are soft, stirring frequently, about 10 minutes. Add 2 cups water, herb sprigs, bay leaf, and milk with corncobs. Increase heat and bring to boil. Cover partially, reduce heat to low, and simmer 20 minutes to blend flavors.
3. Discard corncobs, herb sprigs, and bay leaf. Cool soup slightly. Working in batches, puree soup in blender until very smooth. Strain into large bowl, pressing on solids to extract as much liquid as possible. Season soup to taste with salt and white pepper.
DO AHEAD Can be made 1 day ahead. Cover and chill.
Garnish:
1. Cook bacon in small skillet over medium heat until crisp. Using slotted spoon, transfer to paper towels to drain. Transfer to small bowl. Mix in corn, green onion, and pinch of cayenne.
DO AHEAD Can be made 2 hours ahead. Let stand at room temperature.
2. Rewarm soup over medium heat. Divide among bowls. Sprinkle garnish over, drizzle with crème fraîche, and serve.
Saturday, August 28, 2010
Pan Co' Santi
I'm been on a roll with recipes from My Bread, having great success with Pane Integrale and Rye Bread, so I thought I'd try out something a little more special (I'm working my way towards more treat-like bread), Pan co' Santi. Pan co' Santi is a special occasion bread served in Tuscany on All Saints' Day, November 1st. I'm not patient enough to wait for All Saints' Day to come around to try out the recipe, but I'll be making it again in just a couple of months, substituting some of the bread flour for whole wheat. It's essentially cinnamon-raisin bread with walnuts, so if you're like me and can't resist a piece of cinnamon-raisin toast with peanut butter, you'll love this rustic (and ridiculously simple to prepare) version.
Pan co' Santi
from My Bread by Jim Lahey
3 cups (400 grams) bread flour
1/2 cup (85 grams) raisins
1/2 cup (50 grams) walnuts
1.25 teaspoons (8 grams) table salt
3/4 teaspoon (2 grams) cinnamon
1/2 teaspoon (2 grams) instant or other active dry yeast
Pinch freshly ground black pepper
1.5 cups (350 grams) cool (55 to 65 degrees F) water
Wheat bran, cornmeal, or additional flour for dusting
1. In a medium bowl, stir together the flour, raisins, walnuts, salt, cinnamon, yeast and pepper, mixing thoroughly. Add the water and, using a wooden spoon or your hand, mix until you have wet, sticky dough, about 30 seconds. If it's not really sticky to the touch, mix in another tablespoon or two of water. Cover the bowl and let sit at room temperature until the surface is dotted with bubbles and the dough is more than doubled in size, 12 to 18 hours.
2. When the first rise is complete, generously dust a work surface with flour. Use a bowl scraper or rubber spatula to scrape the dough out of the bowl in one piece. Using lightly floured hands or a bowl scraper or spatula, lift the edges of the dough in toward the center. Nudge and tuck in the edges of the dough to make it round.
3. Place a tea towel on your work surface and generously dust it with wheat bran, cornmeal, or flour. Gently place the dough on the towel, seam side down. If the dough is tacky, dust the top lightly with wheat bran, cornmeal, or flour. Fold the ends of the tea towel over the dough to cover it and place it in a warm, draft-free spot to rise for 1 to 2 hours. The dough is ready when it is almost doubled. If you gently poke it with your finger, it should hold the impression. If it springs back, let it rise for another 15 minutes.
4. Half an hour before the end of the second rise, preheat the oven to 475 degrees F, with a rack in the lower third, and place a covered 4.5- to 5.5-quart heavy pot in the center of the rack.
5. Using pot holders, carefully remove the preheated pot from the oven and uncover it. Unfold the tea towel and quickly but gently invert the dough into the pot, seam side up. (Use caution-the pot will be very hot). Cover the pot and bake for 30 minutes.
6. Remove the lid and continue baking until the bread is a deep chestnut color but not burnt, 15 to 30 minutes more. Use a heatproof spatula or pot holders to carefully lift the bread out of the pot and place it on a rack to cool thoroughly.
Thursday, August 26, 2010
Peas with Lemon, Mint, and Scallions
I bookmarked this recipe (and I do mean in an actual book) much earlier in the summer, and I thought my chance to make it with fresh peas from the farmer's market had passed. Luckily for me, one last stand was selling sugar snap peas and I spent a part of my Saturday morning shelling two pounds of peas to get the eight ounces for this recipe, with a little left over to sprinkle over some fresh green salads. They weren't the best sugar snap peas I've had this summer, but when swirled in a rich pool of butter and heavy cream, who can complain? This dish manages to be fresh and rich at the same time, with simple, classic flavors. Although not my favorite Fast, Fresh, and Green recipe by any means, it is a good recipe that will appeal to a wide range of palates.
Peas with Lemon, Mint, and Scallions
from Fast, Fresh, and Green by Susie Middleton
serves 3
Kosher salt
8 oz. shelled green peas (about 2 cups) or frozen peas (about 1.5 cups)
2 T. unsalted butter
4 large scallions (white and light green parts), thinly sliced
1/4 c. heavy cream
2 t. finely chopped fresh mint
1/2 t. packed finely grated lemon zest
Freshly ground black pepper
1. If using fresh peas: Fill a large saucepan half full with water and 2 teaspoons salt and bring to a boil. Drop the peas into the boiling water and cook until just tender (taste one or two), 2 minutes for smaller peas, 3 minutes for larger, older peas. Begin timing immediately, don't wait for the water to return to a boil. Use a mesh strainer to transfer the peas to a dish towel or a few layers of paper towels to drain. Discard teh water the peas were boiled in, but reserve the pot.
If using frozen peas: Put the peas in a colander and run cold water over them for a few minutes until they're mostly thawed. Spread them out on a few layers of dish towel to drain.
2. Melt the butter in the reserved saucepan over low heat. Add the scallions and saute until softened, about 3 minutes. Add the heavy cream, half of the mint, then lemon zest, 1/4 teaspoon salt, and a few grinds of pepper. Bring the mixture to a boil and cook until it thickens slightly and a wooden spoon lives a wide path when scraped across the bottom of the pan, about 1 minute. Add the peas and stir until they're heated through and well coated with the sauce, 1 minute more. Remove the pan from the heat, taste for salt and pepper, and serve immediately, garnished with the remaining mint.
Wednesday, August 25, 2010
Cheesy Zucchini Casserole
When I first saw this recipe I couldn't decide if it was too simple to be good, or too simple not to be. With a fridge full of farmer's market organic zucchini and farmer cheese, bought right from the people who made it, I decided it couldn't miss. Plus, if there's good cheese involved, there's a good chance I'll like it. Plus, although I can't remember eating a cracker in months, I seem to have quite the cache of crackers in the cabinet-Club, Wheat Tins, Triscuits, Kashi TLC crackers-and it was time I used some up. I will admit that the prep work did take a bit of time, and I was a little doubtful that it was going to be worth it when I put it into the oven, but when it came out all melty with a crunchy, browned crust all my doubts melted away. It's not the world's most complex dish, but it is tasty, satisfying Midwestern comfort food that I'll gladly find on my plate (almost) any day of the week.
Cheesy Zucchini Casserole
adapted from Food and Wine
serves 8
4 tablespoons unsalted butter, 2 melted
1 tablespoon canola oil
3 medium zucchini (about 2 pounds), diced
1 medium onion, finely chopped
Salt and freshly ground pepper
1 1/2 cups finely crushed Club (or other delicious) crackers
1 c. farmer cheese, cut into small cubes
2 large eggs, beaten
1. Preheat the oven to 350°. In a 12-inch ovenproof skillet, melt 2 tablespoons of the butter in the vegetable oil. Add the chopped zucchini and onion, season with salt and pepper and cook over moderate heat, stirring occasionally, until the vegetables are softened, about 10 minutes. Remove the zucchini and onion from the heat and let cool slightly.
2. In a medium bowl, stir the cracker crumbs with the farmer cheese. Stir half of the mixture into the zucchini and season generously with salt and pepper. Stir in the beaten eggs. Spread the remaining cracker crumb and farmer cheese mixture on top of the zucchini. Drizzle the casserole with the 2 tablespoons of melted butter. Bake the casserole for about 25 minutes, until lightly browned and crisp on top. Let the casserole stand for 5 minutes, then serve warm.
Make ahead: The zucchini casserole can be prepared earlier in the day and reheated in a 350° oven.
Tuesday, August 24, 2010
Sweet Corn Fritters
Sick of sweet corn yet? Not me! I've had this recipe bookmarked for quite some time, but finally got around to making it this week. I was pretty excited for corn fritters myself, but when I saw my husband's eyes light up as he took his first bite, I know I'd found a winning recipe. The recipe suggests sour cream, salsa, and other condiments, but these are perfect by themselves. Despite being fried, the whipped egg whites make these fritters wonderfully light, although I still may try using less oil/butter next time, and perhaps a bit of a flavored oil like sesame. Next time I'll probably try adding in some other spices, like ancho chile powder and smoked sea salt. I used a one-fourth cup measure to measure out my fritters; this recipe made 8. Although they won't be as crispy as when fresh out of the hot oil, the leftovers are still delicious as part of lunch or for a snack.
Sweet Corn Fritters
from The Daily Green
Originally published in Edible: A Celebration of Local Foods by Tracey Ryder and Carole Topalian.
Makes 4 to 6 servings
2 cups fresh corn kernels (from about 3 ears of corn)
2 tablespoons all-purpose flour
2 eggs, separated
1/4 cup finely chopped spring onions or scallions
1/2 teaspoon kosher salt, plus more for sprinkling
1/4 teaspoons paprika
1/8 teaspoon freshly ground black pepper
1/8 teaspoon ground cayenne
1/4 cup extra virgin olive oil or grapeseed oil
1 tablespoon unsalted butter
1. In a large bowl, stir together the corn, flour, egg yolks, onions, salt, paprika, pepper and cayenne. Using an electric mixer, beat the egg whites until stiff peaks form. Stir one-quarter of the beaten egg whites into the corn mixture. Using a rubber spatula, gently fold the remaining egg whites into the corn mixture in three additions.
2. In a large skillet, heat the oil and butter over medium heat until the butter has melted. Carefully drop some of the corn mixture by tablespoons in to the hot oil, taking care not to crowd the pan. Cook each fritter until browned, about 2 to 3 minutes. Turn each fritter over and brown the other side, about 1 to 2 minutes. Remove the fritters to a platter lined with paper towels. Sprinkle lightly with salt, if desired. Repeat until all of the corn mixture has been used. Serve hot with some broiled tomatoes, a salsa made with chopped avocado, mango, lime and cilantro, and sour cream, if desired.
Monday, August 23, 2010
Oatmeal Pancakes
I decided to make pancakes for dinner just because I wanted to enjoy more homemade blueberry syrup. I made a second batch of syrup a week or two ago because the first batch went so quickly and apparently not a moment too soon, since, much to my disappointment, the woman selling blueberries wasn't at the farmer's market this past weekend. I wasn't ready for fresh blueberries to be gone, but I'm happy to have a few jars of blueberry syrup to savor over the coming months.
After great success with Pear and Buckwheat Pancakes from Good to the Grain, I decided to try out Kim Boyce's oatmeal pancakes recipe. Pancakes can range from dense and bland, to light and flavorful, and Kim Boyce does pancakes and waffles right. I've yet to be disappointed with a recipe from her cookbook and will keep happily making her whole grain recipes until I run out new ones to try, and then come back to my favorites. These pancakes are wonderfully moist and complement the blueberry syrup well, yet are light and airy when mixed with a light hand.
Oatmeal Pancakes
from Good to the Grain by Kim Boyce
makes about 18 pancakes
When I cook the things I make almost every day, like roasted vegetables or pot of oatmeal, I usually have a bit left over, or I make a bit extra on purpose. This foresight provides handy components for other dishes and saves time when making meals. A cup of cooked oatmeal adds moisture to breads and other baked goods. Stirred into this pancakes batter, the oatmeal creates tenderness and a bit of chew. The molasses provides sweetness and enhances the creamy taste of the oats. These pancakes can be topped with your favorite syrup or jam, and they're fantastic with homemade Apple Butter.
Butter for the pan
Dry Mix:
3/4 c. oat flour
1 c. all-purpose flour
2 T. sugar
2 t. baking powder
3/4 t. kosher salt
Wet Mix:
3 T. unsalted butter, melted and cooled slightly
1.25 c. whole milk
1 c. cooked oatmeal (see Note below)
1 T. unsulphured (not blackstrap) molasses
2 eggs
Note: If you don't have any cooked oatmeal on hand, make a quick batch. In a small saucepan, bring 2 cups of water, 1 cup of whole rolled oats, and a pinch of salt to a boil. Simmer on low heat for about 5 minutes, then cool on the stove while you continue with the recipe. You'll have some extra oatmeal, which you can eat while you're cooking or save for another recipe.
1. Sift the dry ingredients into a large bowl, pouring back into the bowl any bits of grain or other ingredients that may remain in the sifter. Whisk together the butter, milk, oatmeal, molasses, and eggs until thoroughly combined.
2. Using a spatula, gently fold the wet ingredients into the dry ingredients For tender pancakes, it is important that you use a light hand while folding the batter with the spatula. The batter should be slightly thick, with a holey surface.
3. Although the batter is best if used immediately, it can sit for up to 1 hour on the counter or overnight in the refrigerator. When you return to the batter, it will be very thick and should be thinned, 1 tablespoon at a time, with milk-take care not to overmix.
4. Heat a 10-inch cast-iron pan or griddle over medium heat until water sizzles when splashed onto the pan. Rub the pan generously with butter; this is the key to crisp, buttery edges, my favorite part of any pancake. Working quickly, dollop 1/4-cup mounds of batter onto the pan, 2 or 3 at a time. Once bubbles have begun to form on the top side of the pancakes, flip the pancake and cook until the bottom is dark golden-brown, about 5 minutes total. Wipe the pan with a cloth before griddling the next batch. Tub the pan with butter and continue with the rest of the batter. If the pan is too hot or not hot enough, adjust the flame accordingly to keep results consistent.
5. Serve the pancakes hot, straight from the skillet, spooning on a bit of apple butter or the topping of your choice.
Sunday, August 22, 2010
Rye Bread
After being pretty satisfied with the whole wheat bread I made from Jim Lahey's book My Bread, I decided to try out making rye bread. As with the last loaf, with minimal effort I got a wonderfully crusty loaf with a soft and airy interior and tender crumb, perfumed with the delicious scent of fermentation. This bread made both delicious grilled cheese and was the perfect vehicle for a heap of Stoddard's smoked chicken breast, topped with Spirit Valley maple mustard and lettuce.
Rye Bread
from My Bread by Jim Lahey
makes one 10-inch round loaf, 1.25 pounds
2.25 cups/300 grams bread flour
3/4 cup/100 grams rye flour
1.25 teaspoons/8 grams table salt
1/2 teaspoon/2 grams instant or other active dry yeast
1 1/3 cups/300 grams cool (55 to 65 degrees F) water
Rye flour for dusting
1. In a medium bowl, stir together the flours, salt, and yeast. Add the water and, using a wooden spoon or your hand, mix until you have wet, sticky dough, about 30 seconds. Cover the bowl and let sit at room temperature until the surface is dotted with bubbles and the dough is more than doubled in size, 12 to 18 hours.
2. When the first rise is complete, generously dust a work surface with flour. Use a bowl scraper or rubber spatula to scrape the dough out of the bowl in one piece. Using lightly floured hands or a bowl scraper or spatula, lift the edges of the dough in toward the center. Nudge and tuck in the edges of the dough to make it round.
3. Place a tea towel on your work surface and generously dust it with rye flour. Gently place the dough on the towel, seam side down. If the dough is tacky, dust the top lightly with rye flour. Fold the ends of the tea towel over the dough to cover it and place it in a warm, draft-free spot to rise for 1 to 2 hours. The dough is ready when it is almost doubled. If you gently poke it with your finger, it should hold the impression. If it springs back, let it rise for another 15 minutes.
4. Half an hour before the end of the second rise, preheat the oven to 475 degrees F, with a rack in the lower third, and place a covered 4.5- to 5.5-quart heavy pot in the center of the rack.
5. Using pot holders, carefully remove the preheated pot from the oven and uncover it. Unfold the tea towel and quickly but gently invert the dough into the pot, seam side up. (Use caution-the pot will be very hot). Cover the pot and bake for 30 minutes.
6. Remove the lid and continue baking until the bread is a deep chestnut color but not burnt, 15 to 30 minutes more. Use a heatproof spatula or pot holders to carefully lift the bread out of the pot and place it on a rack to cool thoroughly.
Saturday, August 21, 2010
Tex Tubb's Cadillac Ranch
Although I knew I wanted to try out somewhere new to eat this week, I just couldn't decide where to go. I wasn't craving any particular type of cuisine and since most of the apartment leases in the student area started just last weekend, I wasn't eager to venture downtown (although maybe I should have before all the kiddies move back in the dorms too). I decided to pick something fairly close to home that I've passed by many times and offhandedly commented that I'd like to-Tex Tubb's Cadillac Ranch.
Tex Tubb's Cadillac Ranch, formerly the second Tex Tubb's Taco Palace (the first is on Atwood Ave.) is a Tex-Mex venture from Kevin Tubb of El Dorado Grill and Food Fight Inc. The idea to try it out arose merely from driving by it so often on my way downtown to the farmer's market, but after reading some reviews from The Isthmus and Yelp, I was a little less sure of my choice for dinner. Although I'm not one to let reviews make choices for me by any means, I definitely take them into consideration when from sources I respect, like The Isthmus. After quickly reading the reviews and browsing the menu during my break at work, I decided on the fish tacos.
Before I could even crack the dinner menu, I was pleasantly surprised to find the drink menu had a Death's Door Rita, made with Death's Door White Whisky. As a huge fan of Death's Door gin and enthusiastic locavore, I had to try it out. It was the best margarita I've had in recent memory, perhaps ever. I'm not a fan of the frozen, oversweetened, blended margaritas and this on-the-rocks margarita showcased the high-quality spirits without being overpowering. Of course, if you don't like lime, this isn't the margarita for you.
Now on to the fish tacos! I apologize for the lack of pictures, but the restaurant was dark and the stormy sky didn't provide enough light to illuminate my scrumptious dinner. Before I'd even arrived I'd decided on the achiote tilapia, but was pleased to find when I ordered that I was allowed to select three different tacos so I had the achiote tilapia, fried catfish, and marinated shrimp tacos. While the marinated shrimp taco was good, the shrimp itself was only fine and the taco was really held up by the red cabbage, guacamole, black bean purée, chipotle mayonnaise, pickles and onions that topped each taco. The achiote tilapia and catfish were both extraordinary and I'm not ashamed to say I cleaned every bite off my plate, including the only average black beans and Mexican rice. The sumptuous fish is nicely offset by the fresh, soft corn tortilla and acidic, crunchy veggies on top, although the chipotle mayonnaise disappears under the fresh guacamole and subtle, though recognizable, black bean puree. Opt for the achiote tilapia for a fresh, lighter meal and the fried catfish for a crispy, rich treat. If I get a chance to go back, I would order the achiote tilapia and catfish tacos again, with the remaining option, blackened tilapia, rounding out the meal.
For those who don't like Mexican food, there's a decent selection of soups, salads, sandwiches, and burgers, although many have a Tex-Mex slant. This restaurant is very family-friendly, though I also saw what appeared to be either a joint bachelor/bachelorette party or wedding rehearsal dinner renting out the back part of the dining room while I was there.
After this thoroughly satisfying meal, I'm excited to visit the original Tex Tubb's Taco Palace on Atwood Avenue, though I would be happy to go back to the Cadillac Ranch for more fish tacos. Tex Tubb's Cadillac Ranch is located at 2701 University Ave. and open Monday - Wednesday from 11am-9pm, Thursday - Friday 11am-10pm, Saturday 9am-10pm, and Sunday 9am-9pm. Visit their website for more details.
Thursday, August 19, 2010
Double-Lemon Ginger Carrot Salad
This quick, light side is a nice accompaniment to fish, poultry, and sandwiches. It involves no cooking, although julienning the carrots does take a bit of time, and is a way to make raw carrots a bit more interesting. I like the citrus and ginger flavors, although as a huge fan of ginger (I eat crystallized ginger as candy on a regular basis), this could have used a bit more ginger flavor. The sour citrus combined with the sweet ginger and fresh parsley gives the carrots a wide palate of flavor without covering up the inherent flavor of the carrots or destroying the crunchy texture.
Double-Lemon Ginger Carrot Salad
from Fast, Fresh, and Green by Susie Middleton
serves 3
8 to 9 oz. medium or large carrots, preferably organic, peeled
1 T. peanut oil
2 t. minced or finely chopped crystallized ginger
2 T. fresh orange juice
2 T. fresh lemon juice
1/2 t. finely grated lemon zest
1/2 t. minced or finely chopped shallot
1/4 t. kosher salt
2 T. coarsely chopped fresh parsley (or cilantro, if you prefer)
1. Trim the ends of the carrots and lay them on a cutting board. Peel each one into thin julienne strips with a hand-held julienne peeler. It's easier to prop the carrot against the cutting board while peeling and alternate peeling halfway from one end and then halfway from the other end. Continue peeling until you cannot peel anymore. The strips will be inconsistently sized for this salad, and that's okay. You can even use the thinnest, most shredded pieces. Put all of the carrots in a medium bowl.
2. In a small bowl, whisk together the peanut oil, crystallized ginger, orange juice, lemon juice, lemon zest, and shallot. Let sit for a few minutes so that shallots soften and the ginger disperses, and whisk again. Sprinkle the salt over the carrots and drizzle and scrape the dressing over them. Toss and mix well, and let sit for about 5 minutes (10 to 15 minutes at the most), tossing occasionally. Mix in the parsley and serve the carrot salad with a slotted spoon.
Subscribe to:
Posts (Atom)