Saturday, July 31, 2010
Pane Integrale
There are few better smells in the world than freshly baked bread. I don't make it as often as I should, mostly because it is hard to fit in multiple risings on a weeknight or coordinate my weekend schedule around them. For a while there was a trend towards no-knead breads, and Jim Lahey's book My Bread is one of the best to come out of that fleeting culinary obsession. With very little effort and just a bit of scheduling, almost anyone can make fresh homemade bread. While I actually do enjoying kneading bread dough (it's a great stress reliever), this simple technique makes it possible for me to make bread more frequently. The original recipe is below, but I used half whole-wheat and half bread flour and will probably use an even greater proportion of whole wheat flour next time. More whole wheat flour does mean a bit denser loaf, but it also means more flavorful and healthy bread.
In addition to filling my kitchen with comforting aromas as it was baking, the unbaked dough releases the delicious scent of fermentation, one of my other favorite smells in the world, as it usually means fresh bread or beer. This bread is tender and moist on the inside with a wonderfully crusty outside, due in large part to preheating the Dutch oven for half an hour before putting the bread dough in the pot. You may end up with a few crumbs on your shirt, but each crunchy, chewy bite of this rustic bread is worth it.
Pane Integrale (Whole Wheat Bread)
from My Bread by Jim Lahey
2.25 c. (300 grams) bread flour
3/4 c. (100 grams) whole wheat flour
1.25 t. (8 grams) table salt
1/2 t. (2 grams) instant or other active dry yeast
1 1/3 c. (300 grams) cool (55 to 65 degrees F) water
Wheat bran, cornmeal, or additional flour for dusting
1. In a medium bowl, stir together the flours, salt, and yeast. Add the water and, using a wooden spoon or your hand, mix until you have wet, sticky dough, about 30 seconds. Cover the bowl and let sit at room temperature until the surface is dotted with bubbles and the dough is more than doubled in size, 12 to 18 hours.
2. When the first rise is complete, generously dust a work surface with flour. Use a bowl scraper or rubber spatula to scrape the dough out of the bowl in one piece. Using lightly floured hands or a bowl scraper or spatula, lift the edges of the dough in toward the center. Nudge and tuck in the edges of the dough to make it round.
3. Place a tea towel on your work surface and generously dust it with wheat bran, cornmeal, or flour. Gently place the dough on the towel, seam side down. If the dough is tacky, dust the top lightly with wheat bran, cornmeal, or flour. Fold the ends of the tea towel over the dough to cover it and place it in a warm, draft-free spot to rise for 1 to 2 hours. The dough is ready when it is almost doubled. If you gently poke it with your finger, it should hold the impression. If it springs back, let it rise for another 15 minutes.
4. Half an hour before the end of the second rise, preheat the oven to 475 degrees F, with a rack positioned in the lower third, and place a covered 4.5- to 5.5-quart heavy pot in the center of the rack.
5. Using pot holders, carefully remove the preheated pot from the oven and uncover it. Unfold the tea towel and quickly but gently invert the dough into the pot, seam side up. (Use caution-the pot will be very hot). Cover the pot and bake for 30 minutes.
6. Remove the lid and continue baking until the bread is a deep chestnut color but not burnt, 15 to 30 minutes more. Use a heatproof spatula or pot holders to carefully lift the bread out of the pot and place it on a rack to cool thoroughly.
Friday, July 30, 2010
Five-Grain Cream Waffles
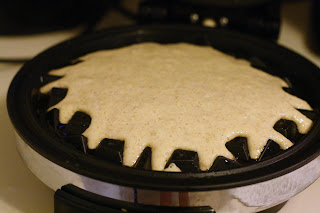
I've neglected one of my favorite cookbooks for far too long, so it's time for another recipe from Good to the Grain. I've had this recipe, along with another waffle recipe, marked since I got the cookbook, but I just haven't gotten around to making any waffles even though I love them. After making blueberry syrup last weekend I knew it was time to come back to this recipe. I already had the multigrain flour mix (recipe below) from when I made Spice Muffins so these waffles were a speedy and delicious weeknight dinner.
I love the nutty, whole-grain flavor of these waffles and they were complemented well by the blueberry syrup, which was sweet, but not overly so. It was always a big treat when my dad would make whole-wheat waffles on a Saturday morning in lieu of our traditional pancakes so waffles always have a touch of nostalgia for me. I froze the extra waffles, which reheat really well in the toaster, providing a quick delicious breakfast (or other meal) any time.
Five-Grain Cream Waffles
from Good to the Grain
makes about 10 waffles
The multigrain flour mix gives these waffles their complex flavor, tender texture, and nice chewy bite. Two cups of bream make the batter particularly delicate and keep the waffles moist even after they cool. Cook the waffles until they are a dark golden-brown, so that the crust has a thin, crisp texture that offsets the fine crumb of the center. Serve these waffles with the best maple syrup you can find a knob of good butter. For an extra-special treat, try BLiS maple syrup; it's aged in bourbon barrels for a rich, round flavor that is incredible.
2 oz. (1/2 stick) butter, melted, for the waffle iron
Dry Mix:
1 c. Multigrain Flour Mix (see below)
1 c. whole-grain pastry flour
1/4 c. sugar
2 t. baking powder
3/4 t. baking soda
1/2 t. kosher salt
Wet Mix:
3 eggs
2 c. heavy cream
1. Turn the waffle iron to its highest setting. Even if you don't usually heat it this high, these waffles come out best when cooked at high heat. Sift the dry ingredients into a bowl, pouring any bits of grain or other ingredients that may remain in the sifter back into the bowl, and set aside.
2. Whisk the cream and eggs together thoroughly. Pour cream mixture into the dry ingredients, using a spatula to get every last bit. With a light hand gently fold the two mixtures together. The batter will be thick and pillowlike, with large pockets of deflated bubbles on the surface.
3. Brush the waffle iron generously with butter; this is the key to a crisp crust. Use a ladle or 1/2-cup measuring cup to scoop batter onto the spaces of the iron. Promptly close, and listen for the iron to sigh as the batter begins to cook. The smell wafting from the iron starts out like a freshly kneaded loaf of bread, then becomes toasty. Remove the waffle when the indicator light shows that it is done, or when a quick peek shows that they've turned a dark golden-brown, 4 to 6 minutes. Remove the hot waffle with a a fork, and repeat with the remaining batter.
4. The waffles should be served hot off the griddle.
Multigrain Flour Mix:
1 c. whole-wheat flour
1 c. oat flour
1 c. barley flour
1/2 c. millet flour
1/2 c. rye flour
Thursday, July 29, 2010
Green Beans with Lemon and Oil
This recipe is a perfect example of how sometimes the simplest recipes are the best. Green beans, quickly cooked until crisp tender and tossed with a bit of oil and lemon are a simple and divine way to savor fresh green beans. I usually blanch my green beans for only 3 to 4 minutes because I like my beans really crunchy, often even eating them raw. This dish tastes in one word, fresh, and is one of the best green bean recipes I've had the pleasure of making.
Green Beans with Lemon and Oil
from Epicurious, who got it from Gourmet
they say it makes 6 side-dish servings, I say only 4 (or less if you really love green beans).
1 lb thin green beans such as haricots verts, trimmed
1 tablespoon extra-virgin olive oil
1/4 teaspoon salt
1 teaspoon fresh lemon juice
1/2 teaspoon finely grated fresh lemon zest
1. Cook beans in a 5-quart pot of boiling salted water until crisp-tender, about 5 minutes. Drain in a colander and immediately transfer to a bowl of ice and cold water to stop cooking. Drain and pat dry.
2. Toss beans with oil, salt, and pepper to taste, then toss with lemon juice and half of zest. Serve beans sprinkled with remaining zest.
Wednesday, July 28, 2010
Mexican Beans with Chorizo and Greens
My trip to Cilantro last Friday inspired me to crack open my Rick Bayless cookbooks again and look for a recipe to try this week. As with most of my cookbooks, Post-It notes are peeking out, marking part of my endless queue of recipes. I opted to find a recipe out of Mexican Everyday instead of Authentic Mexican; the latter has recipes better for long days in the kitchen on the weekend instead of quick weeknight dinners.
This hearty dish is somewhere between a soup and a stew, but isn't too heavy for a summer dinner. Chorizo, like bacon, lends a lot of flavor to a dish even when you only add a small amount. Choose a chorizo with a spice palate you enjoy. If you don't like things spicy, only add one chipotle en adobo; I added two because I love hot food. To make this dish vegetarian, saute onions and garlic in a little olive oil in lieu of the chorizo. The next time I make this dish I may add some chopped onions and garlic (while still using chorizo), although this dish quite wonderful just the way it is.
Mexican Beans with Chorizo and Greens
Frijoles con Chorizo y Espinacas o Acelgas
serves 4
from Mexican Everyday by Rick Bayless
8 to 12 oz. fresh Mexican chorizo sausage, casing removed
10 oz. cleaned young spinach (about 10 cups) OR one 12-ounce bunch Swiss chard, thick lower stems cut off, leaves sliced crosswise into 1/2-inch strips (about 8 cups)
Two 15-ounce cans black beans, drained OR 3.5 c. home-cooked black beans, drained
1 to 2 canned chipotle chiles en adobo, stemmed, seeded, and finely chopped
Salt
1/2 c. crumbled Mexican queso fresco or other fresh cheese such as feta or goat cheese
1/2 c. chopped green onions or thin-sliced red onion, for garnish
1. In a medium-large (4- to 6-quart; 10- to 12-inch-diameter) heavy pot, preferably a Dutch oven, cook the chorizo over medium heat, stirring regularly and breaking up clumps, until lightly browned and thoroughly done, about 8 to 10 minutes.
2. While the chorizo is cooking, place the spinach or Swiss chard in a microwaveable bowl, cover with plastic wrap, poke a few holes in the top and microwave on high (100%) until completely wilted, usually about 2 minutes for spinach, 3 minutes or so for the Swiss chard. (If your spinach comes in a microwaveable bag, simply microwave it in the bag). Uncover the bowl (or open the bag) and set aside.
3. When the chorizo is ready, add the beans, chopped chipotles and 1.5 cups water. Simmer for 5 to 10 minutes to blend the flavors. Taste and season with salt, usually about 1/2 teaspoon, depending on the saltiness of the chorizo and beans. Add the wilted and greens and let the mixture return to a boil.
4. Ladle into bowls and serve, passing the cheese and onion for each person to add al gusto.
Tuesday, July 27, 2010
Spinach and Artichoke Panini
I generally balk at sandwich recipes, but since I got my Cuisinart Griddler I've been inspired to make some more creative sandwiches. This sandwich was obviously inspired by spinach and artichoke dip (this is a pretty good recipe), one of the best appetizers out there. This made a great sandwich, but I'm already envisioning it as a pizza as well.
Don't skimp on the marinated artichokes, cheese, or bread for these sandwiches. With so few ingredients, each one makes a huge difference. Choose a crusty bread like a french bread, sourdough, or rye; basically any sturdy, flavorful bread you enjoy. For cheese I chose smoked butterkase, a high-fat cheese that melts well; the smoky flavor is a nice contrast to the slightly sour artichokes. I chose Native Forest marinated artichokes which were packed in extra-virgin olive oil with Italian spices. If you have plain artichokes, toss them with a bit of olive oil and spices.
Spinach and Artichoke Panini
makes 2 sandwiches
One 6.5-ounce jar marinated quartered artichoke hearts
1/2 c. packed fresh spinach
2 slices cheese such as mozzarella, provolone, or smoked gouda (I used smoked butterkase from Forgotten Valley Cheese, which was amazing)
4 slices crusty bread like French or sourdough (I used whole wheat sourdough from Madison Sourdough Company)
Butter
1. Drain artichoke hearts on a paper towel, draining enough excess oil so the bread won't get soggy. Cut into smaller pieces, if desired.
2. Butter one side of each of the pieces of bread. Layer half of the artichoke hearts, spinach, and cheese on one piece of bread and top with a second slice, buttered sides out. Repeat with the remaining ingredients.
3. Grill sandwiches on a panini press, on a griddle, or in a frying pan until bread is golden brown and cheese is melted. Enjoy!
Labels:
artichokes,
cheese,
panini,
sandwich,
spinach,
vegetarian
Monday, July 26, 2010
The Old Fashioned
My dad came to visit so I got to out for a second meal this week and I chose the Old Fashioned. We were going down to visit Allen Centennial Gardens and I figured since we'd gone to the trouble to drive and park downtown that we should eat on State Street or the Square, which has a bounty of wonderful restaurants. While I've been to the Old Fashioned multiple times in the past, I haven't been there since before I graduated from UW-Madison in 2006 and moved away and I've been meaning to get back there ever since my husband and I moved back. I also support the Old Fashioned for their efforts to acquire much of their food and drink from local sources.
On this visit I didn't choose a beer or glass of wine to go with my meal (although there are nearly 200 local beers to choose from), but a root beer from Baumeister Brewing in Green Bay. Cream soda is my favorite pop, with root beer coming in a close second, although I don't drink pop very much because I try to avoid artificial sweeteners and high fructose corn syrup. I treat myself to a artisinal soda every week or two, usually root beer, cream soda, or ginger ale. When I saw a root beer on tap, I just couldn't resist. It brought back fond memories of sipping on 1919 Root Beer on tap (and playing Ms. Pac Man) at the supper club my mom worked at when I was a kid. A&W and Barq's root beer can't even compare to draft root beer. It is so refreshing to taste a root beer that is more than just sweet and full of spices and subtle nuances that have long since been neglected since pop became the principal beverage in many people's lives. If you like root beer, never pass up an opportunity to try craft draft root beer.
For lunch I ordered #41 (the sandwiches don't have names), described on the menu as "wood-grilled and slow roasted pork shoulder, hand pulled and topped with pickle relish, Muenster cheese and smoked paprika sauce on Texas toast". Absolutely delicious; the dim, low resolution cell phone picture doesn't even come close to doing it justice. The pork was moist, well-seasoned, and covered with browned cheese, smoky sauce, and decent (though I suspect commercial) relish. The sweet relish was a nice contrast to the rich cheese and savory pork. The pork was generous piled on, although the Texas toast was unremarkable. I'm not big fan of plain old white bread, but it was an adequate delivery device for the succulent pork. I had fries on the side, but you can also have a salad or upgrade haystack onion strings, herbed potato salad from Porchlight or house-made fresh Wisconsin beer-battered cheese curds. I was deeply tempted by onion strings or cheese curds, but after having Chocolate Zucchini Cake a few hours earlier and with plans to get Babcock Hall ice cream later, I felt I didn't really need deep-fried breaded cheese.
My husband had the Old Fashioned House burger, which he has loved in the past and was savored again today. My dad had the #42, described as "roast beef tenderloin, thinly sliced and served chilled with tiger blue sauce, shaved red onions and leaf lettuce on toasted country bread", which he liked, but said he would choose what I or my husband chose if he was to eat at the Old Fashioned again in the future.
The Old Fashioned is well-worth the effort it can take to get downtown and park, even with all the road construction. The Old Fashioned is located on Capital Square at 23 N. Pinckney St. Madison, WI. Hours are 11 am-2 am Mon.-Fri., 9 am-2 am Sat., 9 am-10 pm Sun.
Sunday, July 25, 2010
Chocolate Zucchini Cake
Zucchini is cheap and plentiful at the farmer's market and lucky there is a plethora of recipes to go with the bumper crop of summer squash available. Zucchini bread is a good place to start, but there are many more sweet and savory zucchini recipes out there just begging to be tried this summer.
I would happily have dessert every day if I wasn't thinking of my health. I really enjoy fresh fruits and vegetables, but they are no substitute for ice cream or cake. I eat pretty healthy most of the time, always allowing myself some indulgences, and when it comes to desserts I don't swap out butter, cream, or sugar for "healthier" options if they reduce the quality of the desserts. As with alcohol, I'd rather have a small amount of something really good than more of something mediocre. That being said, I love it when a dessert is both delicious and has some healthy components. While I wouldn't call chocolate zucchini cake healthy, it does have zucchini and heart-healthy walnuts. I also swapped out one cup of the all-purpose flour for one cup of white whole wheat flour, so it contains some whole grains, and swapped out vegetable for more healthy canola oil. And let's not forget all the antioxidants and mood-boosting chemicals in cocoa and dark chocolate! If I can enjoy a rich, chocolaty, almost brownie-like cake while sneaking in some vegetables, all the better.
Chocolate Zucchini Cake
adapted from Epicurious, who got it from Bon Appetit
1.25 c. unbleached all-purpose flour
1 c. white whole wheat flour (use more all-purpose if you don't have any)
1/2 c. unsweetened cocoa powder
1 t. baking soda
1 t. salt
1.75 c. sugar
1/2 c. (1 stick) unsalted butter, room temperature
1/2 c. canola oil
2 large eggs
1 t. vanilla extract
1/2 c. buttermilk or sour milk
2 c. grated unpeeled zucchini (about 2.5 medium)
6 oz. (about 1 cup) bittersweet chocolate chips (I use Ghiradelli 60% cacao chocolate chips)
3/4 c. chopped walnuts
1. Preheat oven to 325°F. Butter and flour 13 x 9 x 2-inch baking pan. Sift flour, cocoa powder, baking soda and salt into medium bowl.
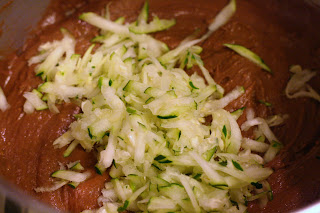
2. Beat sugar, butter and oil in large bowl until well blended. Add eggs 1 at a time, beating well after each addition. Beat in vanilla extract. Mix in dry ingredients alternately with buttermilk in 3 additions each. Mix in grated zucchini. Pour batter into prepared pan. Sprinkle chocolate chips and nuts over.
3. Bake cake until tester inserted into center comes out clean, about 50 minutes. Cool cake completely in pan.
Perfect Blueberry Syrup
One of the most frustrating parts about summer and the bounty of produce at the farmer's market is that there is never enough time to try all the recipes you'd like to for a particular fruit or vegetable, and then they're gone until next year. This blueberry syrup lasts up to 6 months in the fridge so you can drizzle a taste of summer over your pancakes on a cool fall morning. It is nice to have a fruit syrup with no high fructose corn syrup and that is sweetened much less than most commercial syrup (I am not a fan of super-sweet food).
A candy thermometer is a necessity for this recipe. You can test what stage the sugar syrup is at through other methods, but they aren't nearly as accurate and the scientist in me can't rely on my qualitative judgment when I could do a quantitative measurement. Plus, my candy thermometer allows you to set an alert temperature so I can do other things while my sugar syrup happy boils away-the alert goes off three degrees before your target temperature so you won't miss it, which is extremely important in candy making as a few degrees can make a huge difference. If you haven't made candy before, you probably won't know how fast to expect the temperature to change. The temperature will rise fairly quickly to the 210 degree neighborhood, then hover there for a while as the water boils off, then steadily rise to the final temperature. Don't get too frustrated if you are stuck at 212 degrees for a while.
I'm looking forward to drizzling this syrup over pancakes, waffles, ice cream, and yogurt and maybe even trying to make a blueberry latte. With the generous amount that this recipe makes I have plenty to let my imagination run wild. Enjoy!
Perfect Blueberry Syrup
from Food and Wine
makes about 6 cups
1.5 lbs. blueberries (5 c.)
4 c. water
2 c. sugar
Six 1-inch strips of lemon zest removed with a vegetable peeler
3 T. fresh lemon juice
1. In a pot, combine the blueberries with 1 cup of the water. Crush the berries with a potato masher and bring to a simmer. Simmer over low heat for 15 minutes. Strain the juice into a heatproof measuring cup, pressing hard on the solids. Discard the solids.
2. Rinse out the pot. Add the sugar, lemon zest and the remaining 3 cups of water and bring to a boil, stirring to dissolve the sugar. Boil the syrup over moderate heat until it registers 225° on a candy thermometer, about 20 minutes. Add the blueberry juice and lemon juice and boil over high heat for 1 minute. Let the syrup cool, then discard the lemon zest. Pour the syrup into just-cleaned bottles. Seal and refrigerate for up to 6 months.
Saturday, July 24, 2010
The Perfect Gin and Tonic
The gin and tonic is the ultimate mixed drink for summer. Light and refreshing, it cuts through the heat of the most oppressive summer day, and it by no means requires a recipe to make it. I rarely measure anything when making mixed drinks at home, but I was curious to see what proportions different recipes use. What I tend to make for myself pretty closely resembles the Food Network recipe I'm posting here, but varies from day-to-day. The most important difference my gin and tonic and the Food Network "Perfect Gin and Tonic" is the ingredients and the main reason I wanted to talk about a gin and tonic recipe. They recommend Plymouth gin and Schwepps tonic; I recommend Death's Door gin and Stirrings tonic water, which are not nearly as easy to find. Stirrings tonic water will probably be available at most liquor stores, but Death's Door gin is going to be most available in Wisconsin, particularly the southern part of the state (Death's Door Spirits is located in Madison). Some people prefer lemon in their gin and tonic, but I agree with the Food Network that lime is the way to go.
Why do I use much harder to find ingredients for my gin and tonics? I would rather have one high quality drink than multiple substandard ones. I get no pleasure out of rail gin and generic tonic and think the investment in quality ingredients is well worth it. Death's Door gin, aside from being a delicious, high-quality gin, is made from hard red winter wheat grown on Washington Island and processed in Madison. I'm happy to see Wisconsin not only have a flourishing microbrewery and winery culture, but start to produce its own spirits. Buying local is a passion of mine, and alcohol is no exception (my refrigerator currently contains local wine and beer as well). Stirrings tonic is the only tonic I've been able to find without high fructose corn syrup or artificial sweetener, both of which I avoid if at all possible. Bartenders were pouring gin and tonics long before these horrible ingredients permeated so much of our food and drink, and I wish more authentic cocktail ingredients were readily available (Stirrings is a great source).
The Perfect Gin and Tonic
from the Food Network, with caveats
4 to 5 tonic water ice cubes
3 oz. gin
4 oz. tonic water
1 T. freshly squeezed lime juice
Lime wedge for garnish
Place the ice cubes in a tall, narrow, chilled glass (the cubes should come near the top.) Add the gin, then the tonic water, then the lime juice, stirring well. Garnish with lime wedge, and serve immediately.
Note: To make the ice cubes, simply fill an empty ice cube tray with tonic water, and let the cubes freeze. It takes just a few hours. Covered well, the cubes will remain fresh-tasting in the freezer for at least a few weeks.
Cilantro Bar and Grill
Rick Bayless is my favorite chef, but his restaurants are all the way in Chicago, and I unfortunately have no plans to visit them in the near future (although I do have a great desire to make the trip). I was very excited to learn in this Isthmus article that three Frontera alums have opened Cilantro Bar and Grill, less than a mile and a half from my house, in the former Fiesta locale on Tree Lane. I ate at Fiesta during its short tenure, and was shocked and excited to see the drastic transformation that has turned that locale in Cilantro. Unfortunately there will be no pictures of my meal since I didn't feel comfortable whipping out my cell phone camera to snap a few pics since they classed up the joint.
Fiesta was, more or less, your typical Americanized Mexican restaurant, with free chips and salsa on the table and chimicangas on the menu. The food there was good and executed competently, but had no culture or soul. Cilantro is an entirely different animal. The scent of freshly made corn tortillas greets you as you enter the restaurant with friendly and attentive staff and an inviting atmosphere. In contrast to the sad and empty Fiesta, Cilantro's dining room was full of customers enjoying a wonderful authentic Mexican meal in a slightly formal, but still comfortable, environment.
My dining experience started with a divine glass of house-made sangria. That, combined with the flamenco dancer performing live in the restaurant, brought me back to my first sips of sangria during a flamenco show in Barcelona during a trip to Spain in high school. For dinner I ordered the Enchiladas de Pollo con Mole Negro, which was served with rice and beans on the side. Moles are notoriously complex and, when properly made, take an entire day to meld the many flavors from chiles, nuts, spices, and chocolate and are thus something I'll probably never have time to make myself. The mole was spicy, as it should be, but not overly so and subtle hints of chocolate, chiles, nuts, and spices came through in every bite. I have no hope of identifying all the elements that compose this delicious mole negro, but each bite was a true pleasure. The rice that accompanied the enchilidas was perfectly cooked and seasoned well with in part, of course, cilantro, but the black beans were quite ordinary, just topped with a sprinkling of queso fresco, that I hope they make in house (making queso fresco is quite easy; Rick Bayless has even demonstrated on Mexico: One Plate at Time). I'll happily forgive them the plain black beans (which I still like) after all the effort that went into the mole negro, although I hope they find a way to make the black beans more interesting in the future.
I came to Cilantro with high hopes and expectations and I was not disappointed. My visit to Cilantro not only makes me want to come back, but also makes me want to crack open some of my Rick Bayless cookbooks that I haven't cracked open in too long a time. A meal that leaves you not only sated, but inspired, is a rare thing and I recommend this place to anyone who wants their meal to deliver more than mere sustenance.
Cilantro Bar and Grill is located at 7005 Tree Lane in Madison, WI.
Thursday, July 22, 2010
Orzo with Peas and Bacon
A combination of being gone last weekend and a really busy week has left me with little time to cook for dinner (and less fresh vegetables than I'd like since I didn't go to the farmer's market last weekend). I threw this flavorful dish together quickly using ingredients I already had on hand and wanted to use up. It's delicious warm, but also pretty good cold the next day if you don't have access to a microwave to heat up your lunch.
Orzo with Peas and Bacon
serves 4
4 slices bacon, cut into small pieces (preferably smoked)
8 oz. whole wheat orzo
1/2 c. chopped white onion
1 c. shelled green peas fresh or frozen, thawed (I had some left I'd frozen from the farmer's market)
Freshly ground salt and pepper
1/4 c. shaved Parmigiano-Reggiano cheese
1. Heat a skillet over medium heat and add bacon pieces. Once the bacon has started to render some fat, add the chopped onion and cook until bacon is crisp and onion is browned and tender.
2. Meanwhile, bring a large pot of salted to water to a boil. Add orzo and cook until just shy of al dente, around 7 minutes. Drain, reserving 2 T. of the pasta water, and set aside.
3. Add peas to bacon and onions, cook 1 minute. Add orzo and pasta water and toss mixture well to combine. Season to taste with salt and pepper. Top with Parmiggiano-Reggiano cheese.
Tuesday, July 20, 2010
A Weekend in Food: Cooking Around the Campfire
This past weekend my husband and I spent a couple nights at Lake Kegonsa State Park, outside of Stoughton. One of my favorite things about camping is cooking over fire in the great outdoors. For me, camping isn't a time for complicated recipes or experimentation, but a time for the tried and true classics-burgers, brats, smores, etc.
Here's the story of my camping weekend-in food!
We started our weekend off with a delicious lunch at Springers on the Lake in Stoughton, near Lake Kegonsa State Park, where we camped. Go here for a more detailed review, but in a few words-great food, great view.
The first night for dinner we had hamburgers and corn-on-the-cob. I had grass-fed ground beef from Grassy Way Organics and topped the burgers with smoked cheddar cheese from Hook's Cheese, both purchased at the Dane County Farmer's market. I seasoned the burgers with salt and pepper and grilled them using a Coleman Extendable Broiler Basket. For dessert we had smores, because no camping trip is complete without them.
Saturday morning we had the required bacon and eggs breakfast (made over the fire, of course), along with some wheat toast made using the broiler basket (which I tried for the first time this year). The eggs came from Pecatonica Valley Farm and the hickory smoked bacon from Lodi Sausage Company and Meat Market. The whole wheat bread for toast came from Nature's Bakery Cooperative and the Hedgerow Jam from The Summer Kitchen (a DCFM vendor).
Lunch was the only meal I made using my camp stove, although I did use it to boil water to cook corn-on-the-cob Friday night. Ordinarily I would have cooked over the fire for all our meals, but with temperatures in the 90s and oppressive humidity, it was nice to use my Coleman camp stove that I haven't had an opportunity to use since I got it for Christmas. Grilled cheese (made with more Hook's smoked cheddar cheese and Nature's Bakery bread) with a salad on the side (mix of greens from Harmony Valley Farm) made a quick and delicious lunch.
Dinner was brats and beans, a classic combination I never get tired of and the most essential meal in any camping trip. Beer brats from Pecatonica Valley Farm topped with onions and sauerkraut with Bush's Steakhouse Recipe Grilling Beans on the side made the perfect meal to enjoy around the fire on our last night camping. This was, of course, followed up by more smores.
On our last morning, I made maple sugar french toast with a side of bacon. My normal french toast recipe using a mixture of spices, sugar, and vanilla, but I wanted something a bit simpler so I wouldn't have to bring so many supplies. I had some maple sugar from the farmer's market which I combined with the usual eggs and milk to make a simple, but wonderful french toast. I topped the french toast with butter and real maple syrup-no imitation products here.
Over the course of the weekend we enjoyed a number of different brews, mostly local. I picked up a party pack from Whole Foods, which contained eight different beers, including Fat Squirrel and Spotted Cow from New Glarus Brewing Company, Island Wheat and Autumnal Fire from Capital Brewery and Down Dirty Chocolate Oatmeal Stout from Tyranena Brewing Company. If you like to sample different beers and either don't have the time or have difficulty choosing individual bottles to try, I'd highly recommend the party pack from Whole Foods. I love trying different kinds of beers, but didn't have the time to go somewhere where I could fill a 6-pack with individual bottles. You can see all the beers in the pack to ensure you're at least getting a few you'll like, but get a fun variety with little effort. My favorite was the Tyranena Chocolate Oatmeal Stout, which was no surprise considering I tend to gravitate towards dark beers like stouts and porters with coffee notes.
I hope everyone gets a chance to enjoy a few days in the great outdoors the summer with some great eats cooked over the fire. Happy summer!
Sunday, July 18, 2010
Springers on the Lake
It's been a few days since I posted a new recipe and that's because I just got back from a camping trip to Lake Kegonsa State Park. My husband and I left on Friday, stopping for lunch at Springers on the Lake in Stoughton on our way to the park. I found this place on the Isthmus website after searching for all the restaurants in Stoughton (it's a short list) and was pleasantly surprised at how wonderful it turned out to be. From the website it looked like your basic sandwich place with a great location on Lake Kegonsa, but the food far exceeded my expectations.
First, let's start with the view. Anything is going to taste better when you're looking out on a beautiful lake on a sunny summer day.
We started with some scrumptious deep-fried cheese curds and some Leinie's (hey, we were on vacation). After being stranded in Iowa for a few years, I'm still delighted to see deep-fried cheese curds on so many menus, even though this is Wisconsin and it would almost be sacrilege not to have them. I don't indulge in them too often, but we decided to go for it since it was a vacation. They arrived, warm and gooey, only about 5 minutes after we ordered them. They were pleasantly salty, with a hot and melty center and a crisp outer breading. A light and refreshing Leinie's Summer Shandy was the perfect beverage for looking out on the lake on a hot summer day.
Our sandwiches and fries arrived fresh and hot before we'd even finished our cheese curds, despite there being multiple tables of customers. I had a Reuben with waffle fries; my husband also had a Reuben, but with regular fries. Reubens are my favorite sandwich (with the Cuban coming in a close second) and I probably order them far too often, although because they are on many menus they are a good gauge of the quality of a restaurant. The corned beef was good, although not extraordinary, covered in a generous portion of dressing, kraut, and melted cheese, all tucked into thick marble rye bread. The sandwich was crisp on the outside, but the interior of the bread was still soft and supple and melted into the sauerkraut, dressing, cheese, and meat. The waffle fries were pretty good, but nothing particularly special.
I would visit this place again in a heartbeat. The food was delicious, the service prompt and friendly, and the view extraordinary. What more could you ask for on a beautiful summer day?
Wednesday, July 14, 2010
Ginger Garlic Green Beans
I adore fresh green beans. I happily eat them raw a lot of the time, but as a side for dinner I usually quickly blanch them (so they remain tender-crisp) and add a simple sauce or seasonings. These green beans have a strong, but not overpowering flavor that will appeal to most people who like classic Asian flavors (ginger, garlic, sesame oil, etc.). It comes together quickly and is made with ingredients I always have on hand.
Ginger Garlic Green Beans
adapted from Epicurious, who got it from Gourmet
serves 2 as a side dish
8 oz. green beans, rinsed and trimmed
2 garlic cloves, pressed through a garlic press
1/2 T. soy sauce
1/2 T. grated peeled ginger
1 t. rice vinegar
1/2 T. sesame oil
1/2 t. sesame seeds, toasted
1. Cook beans in a large pot of boiling water, uncovered, until crisp-tender, 3 to 4 minutes. Drain in a colander, then plunge into an ice bath or rinse thoroughly with cold water to stop cooking. Drain beans and pat dry.
2. While beans cook, combine garlic, soy sauce, ginger, vinegar, oil, and sesame seeds in a small bowl.
3. Pour sauce over beans and toss well to coat.
Subscribe to:
Posts (Atom)