Tuesday, March 30, 2010

Pork Lo Mein


I'm back with a new recipe! I'll be honest, I almost didn't make this for dinner tonight. I had to work late and was feeling lazy, but I'm glad that I made myself cook this for dinner. Although sometimes it's hard to get up the motivation to start when I'm busy and tired, cooking is always ultimately good for my mood and really relaxes me.


I saw this recipe on an episode of America's Test Kitchen and thought it sounded right up my alley. I couldn't find fresh Chinese egg noodles so I used dried linguine, substituted fish sauce for the oyster sauce since that's what I had, and my grocery store was shamefully out of shiitake mushrooms, so I had to use regular white mushrooms. But it still turned out great! I used Sriracha for the chile garlic sauce and if you don't like things spicy, I'd cut back or eliminate it all together (lucky for me, I love spicy food).

Pork Stir Fry with Noodles (Lo Mein)
from America's Test Kitchen
Serves 4

3 T. soy sauce
2 T. oyster sauce
2 T. hoisin sauce
1 T. toasted sesame oil
1/4 t. five-spice powder
1 lb. boneless country-style pork ribs, trimmed of surface fat and excess gristle and sliced crosswise into 1/8-inch pieces
1/4 t. liquid smoke (optional)
1/2 c. low-sodium chicken broth
1 t. cornstarch
2 medium garlic cloves, minced or pressed through a garlic press (about 2 t.)
2 t. grated fresh ginger
4.5 t. vegetable oil
4 T. Chinese rice cooking wine (Shao-Xing) or dry sherry
1/2 lb. shiitake mushrooms, stems trimmed, caps cut in halves or thirds (about 3 c.)
2 bunches scallions, whites thinly sliced and greens cut into 1-inch pieces (about 2 c.)
1 small head Napa or Chinese cabbage, halved, cored, and sliced crosswise into 1/2-inch strips (about 4 c.)
12 oz. Chinese egg noodles (fresh) or 8 oz. dried linguine
1 T. Asian chile garlic sauce 
1. Bring 4 quarts water to boil in Dutch oven over high heat.

2. Whisk soy sauce, oyster sauce, hoisin sauce, sesame oil, and five-spice powder together in medium bowl. Place 3 tablespoons soy sauce mixture in large zipper-lock bag; add pork and liquid smoke, if using. Press out as much air as possible and seal bag, making sure that all pieces are coated with marinade. Refrigerate at least 15 minutes or up to 1 hour. Whisk broth and cornstarch into remaining soy sauce mixture in medium bowl. In separate small bowl, mix garlic and ginger with 1/2 teaspoon vegetable oil; set aside.

3. Heat 1 teaspoon vegetable oil in 12-inch cast-iron or nonstick skillet over high heat until just smoking. Add half of pork in single layer, breaking up clumps with wooden spoon. Cook, without stirring, 1 minute. Continue to cook, stirring occasionally, until browned, 2 to 3 minutes. Add 2 tablespoons wine to skillet; cook, stirring constantly, until liquid is reduced and pork is well coated, 30 to 60 seconds. Transfer pork to medium bowl and repeat with remaining pork, 1 teaspoon oil, and remaining 2 tablespoons wine. Wipe skillet clean with paper towels.
4. Return skillet to high heat, add 1 teaspoon vegetable oil, and heat until just smoking. Add mushrooms and cook, stirring occasionally, until light golden brown, 4 to 6 minutes. Add scallions and continue to cook, stirring occasionally, until scallions are wilted, 2 to 3 minutes longer; transfer vegetables to bowl with pork.
5. Add remaining teaspoon vegetable oil and cabbage to now-empty skillet; cook, stirring occasionally, until spotty brown, 3 to 5 minutes. Clear center of skillet; add garlic-ginger mixture and cook, mashing mixture with spoon, until fragrant, about 30 seconds. Stir garlic mixture into cabbage; return pork-vegetable mixture and chicken broth-soy mixture to skillet; simmer until thickened and ingredients are well incorporated, 1 to 2 minutes. Remove skillet from heat.

6. While cabbage is cooking, stir noodles into boiling water. Cook, stirring occasionally, until noodles are tender, 3 to 4 minutes for fresh Chinese noodles or 10 minutes for dried linguine. Drain noodles and transfer back to Dutch oven; add cooked stir-fry mixture and garlic-chili sauce, tossing noodles constantly, until sauce coats noodles. Serve immediately.


Saturday, March 27, 2010

Local Grilled Cheese and Jacques Pepin

Long time, no post! Okay, maybe not that long, but nine days is the biggest blogging break I've had since I started this blog. A weekend of eating out for my anniversary, followed by a busy week complete with a migraine that destroyed one evening and left me in a foggy postdrome state for a couple of days, means I haven't had the chance to try any new recipes in a while. Although I didn't try any new recipes, I didn't abandon cooking entirely.

On Sunday and Thursday, we had grilled cheese sandwiches.Yes, twice. But I'm not talking Kraft singles and Wonder Bread, I'm talking locally-sourced, gourmet grilled cheese. I bought rustic french bread from Cress Spring Bakery and smoked cheddar cheese from Hook's Cheese at the Dane County Farmer's Market which made for some incredible grilled cheese. To jazz it up the second time, I added some thick smoked bacon. My husband insisted I take a picture he said it was so beautiful.

I always walk out of a farmer's market with more than I intended to buy, be it summer or winter. Since there aren't many fruits or vegetables available at the farmer's market right now (although there are a few), I spend most of time my time perusing cheeses and meats these days. In addition to local grilled cheese, honey weiners from a vendor at the farmer's market were also on the menu. Simple, but delicious, and I feel good supporting the economy of a city I love so much. As trite of a sentiment as it has become lately, I really do like knowing where my food comes from, reducing my food miles, and eating food with minimal preservatives and other artificial ingredients.

In other cooking-related news, today Jacques Pepin's Complete Techniques arrived in the mail! I've had this seminal cookbook on my long list of cookbooks I'd like to acquire for quite some time, but finally got around to ordering it this week. I can't wait to dive into some recipes and work on honing my techniques.

Thursday, March 18, 2010

Vegetable and Spicy Sausage Soup


Yes, another recipe from the March 2010 issue of Cooking Light. I think this will be last one and I'll be back to cookbooks or recipes from one of many other magazines I receive. The current issue of Cooking Light that arrived earlier this week doesn't have nearly as many tempting recipes, so I'll be broadening my recipe source again.

This soup is spicy and satisfying, despite being healthy and low in calories. I had to add a little butter to the pan before cooking my veggies since the sausage didn't render enough fat. I added the sausage back in with the pureed vegetable/bean mixture and broth so the sausage flavor would have more time to infuse the rest of the soup. I also used a few tablespoons or so of fresh parsley instead of fresh rosemary since I had fresh parsley on hand.

Vegetable and Spicy Sausage Soup
from Cooking Light, March 2010

4 ounces 50%-less-fat sausage (such as Jimmy Dean)
1.5 c. finely chopped onion
1.25 c. finely chopped zucchini
1/2 c. finely chopped carrot
1/3 c. finely chopped celery
1/2 t. kosher salt, divided
2 garlic cloves, minced
2 T. tomato paste
1/8 t. ground red pepper
3 c. fat-free, less-sodium chicken broth, divided
1 (15.5-ounce) cans organic cannellini beans, rinsed, drained, and divided
1/3 c. half-and-half
1 t. chopped fresh rosemary
1/2 t. freshly ground black pepper


1. Heat a large Dutch oven over medium-high heat. Add sausage to pan and cook for 4 minutes or until browned, stirring to crumble. Remove from pan; keep warm.

2. Return pan to medium heat. Add onion, zucchini, carrot, celery, 1/4 t. salt, and garlic; cook for 5 minutes or until vegetables are tender, stirring frequently. Stir in 2 T. tomato paste and red pepper; cook for 1 minute, stirring constantly. Place 1 c. vegetable mixture, 1/2 c. broth, and 1 can of beans in food processor and process until smooth.


3. Return pureed bean mixture to pan. Add remaining 2.5 c. broth and 1 can beans; bring to a boil. Reduce heat, and simmer for 20 minutes or until vegetables are thoroughly cooked. Remove from heat, and stir in remaining 1/4 t. salt, half-and-half, rosemary, and 1/2 t. black pepper.

Tuesday, March 16, 2010

Cheesy Baked Pasta with Spinach and Artichokes


A quick and easy side- or main-dish courtesy of the April 2010 issue of Real Simple. I love spinach and artichoke dip and this is almost spinach and artichoke dip on pasta. I'm always looking for interesting and easy dishes I can make for dinner after work to help me avoid the temptation of convenience foods like frozen pizza.

This dish doesn't have as much sauce as I'd like so I think next time I'll add some milk, sour cream, or cream cheese or some combination of them. Even as is, it's delicious!

Cheesy Baked Pasta with Spinach and Artichokes
from Real Simple, April 2010

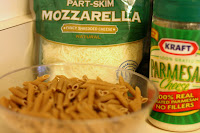
8 oz. mezzi rigatoni or some other short pasta (I used whole wheat penne rigate)
1 14-ounce can artichoke hearts, rinsed and quartered
1 9-ounce package creamed spinach, thawed
1/4 c. grated Parmesan
2 c. grated mozzarella
1/4 t. black pepper


1. Cook the pasta according to package directions, drain, and return it to the pot. Heat broiler.

2. Add the artichoke hearts, creamed spinach, Parmesan, half the mozzarella, and 1/4 t. pepper to the pasta and toss to combine.

3. Transfer the mixture to a shallow 2-quart (or 8-inch square) broilerproof baking dish and sprinkle with the remaining mozzarella. Broil until the cheese is browned in spots, 2 to 3 minutes.

Sunday, March 14, 2010

Beef and Guinness Stew


I love a hearty stew and Guinness so this recipe immediately appealed to me when I saw it in the March issue of Cooking Light (it seems a lot of recipes did). This is definitely a weekend dish because it takes a few hours for the stew to cook and requires quite a bit of prep work chopping vegetables. It was definitely worth the effort.

Beef and Guinness Stew
from Cooking Light, March 2010

2 T. canola oil, divided
1 T. butter, divided
1/4 c. all-purpose flour
2 lbs. boneless chuck roast, trimmed and cut into 1-inch cubes
1 t. salt, divided
5 c. chopped onion (about 3 onions)
1 T. tomato paste
4 c. fat-free, less-sodium beef broth
1 (11.2-ounce) bottle Guinness Draught
1 T. raisins
1 t. caraway seeds
1/2 t. black pepper
1.5 c. (1/2-inch-thick) diagonal slices carrot (about 8 oz.)
1.5 c. (1/2-inch-thick) diagonal slices parsnip (about 8 oz.)
1.5 c. (1/2-inch) cubed, peeled turnip (about 8 oz.)
2 T. finely chopped fresh flat-leaf parsley
1. Heat 1 T. oil in a Dutch oven over medium-high heat. Add 1.5 t. butter to pan. Place flour in a shallow dish. Sprinkle beef with 1/2 t. salt; dredge beef in flour. Add half of beef to pan; cook 5 minutes, turning to brown beef on all sides. Remove beef from pan with a slotted spoon. Repeat procedure with remaining 1 T. oil and 1.5 t. butter, and beef.

2. Add onion to pan; cook 5 minutes or until tender, stirring occasionally. Stir in tomato paste; cook 1 minute, stirring frequently. Stir in broth and beer, scraping pan to loosen browned bits. Return meat to pan. Stir in remaining 1/2 t. salt, caraway seeds, and pepper; bring to a boil. Cover, reduce heat, and simmer 1 hour, stirring occasionally. Uncover and bring to a boil. Cook 50 minutes, stirring occasionally. Add carrot, parsnip, and turnip. Cover, reduce heat to low, and simmer 30 minutes, stirring occasionally. Uncover and bring to a boil; cook 10 minutes or until vegetables are tender. Sprinkle with parsley.

Saturday, March 13, 2010

Black and Tan Brownies


The phrase "black and tan" was originally used to refer to British soldiers that were sent to suppress Irish rebels after the 1916 Easter Rising, but has since is known more commonly as the delicious drink concoction made of half Harp Lager and half Guinness Stout. Now these delicious brownies from Cooking Light are borrowing the name, and I definitely think they do it justice.

These brownies are heaven. The bottom layer is chewy and toffee-ish, while the top layer is light with a deep chocolate flavor. The brownies don't taste like Guinness, but the chocolate layer with Guinness has a more intense flavor.

Black and Tan Brownies
from Cooking Light, March 2010


Tan Brownies
6 T. butter, softened
1.5 c. packed brown sugar
2 large eggs
4.5 oz. all-purpose flour (about 1 c.)
1 t. baking powder
1/4 t. salt
1/2 c. chopped pecans
Cooking spray


Black Brownies
3 oz. unsweetened chocolate, finely chopped
4 T. butter
1 c. granulated sugar
2 large eggs
1 t. vanilla extract
1 c. Guinness Stout
4.5 oz. all-purpose flour (about 1 c.)
1/4 t. salt

1. Place one rack in lower third of oven; place another rack in center of oven. Preheat oven to 350 degrees.

2. To prepare Tan Brownies, place 6 T. butter and brown sugar in medium bowl; beat with a mixer at medium speed until light and fluffy. Beat in 2 eggs and 1 t. vanilla. Weigh or lightly spoon 4.5 oz. flour (about 1 c.) into a dry measuring cup; level with a knife. Combine 4.5 oz. flour, baking powder, and 1/4 t. salt, stirring well. Add flour mixture and pecans to sugar mixture, beating just until combined. Spoon into a 13 x 9-inch baking pan coated with cooking spray, spreading evenly with a knife or rubber spatula. Bake at 350 degrees in the lower third of the oven for 15 minutes.


3. To prepare Black Brownies, melt chocolate and 4 T. butter in a large microwave-safe bowl on HIGH for 1 minute or until melted, stirring after every 20 seconds until smooth. Add granulated sugar, stirring until well combined. Add 2 eggs, 1 t. vanilla, and Guinness, stirring with a whisk until well-combined. Weigh or lightly spoon 4.5 oz. flour (about 1 c.) into a dry measuring cup; level with a knife. Combine 4.5 ounces flour and 1/4 t. salt, stirring well. Add flour mixture to chocolate mixture, stirring to combine. Pour mixture evenly over Tan Brownies.


4. Bake on the center rack at 350 degrees for 25 minutes or until a wooden pick inserted into center comes out almost clean. Cool in pan on a wire rack; cut into squares.

Sunday, March 7, 2010

Blueberry Corn Muffins


This past week I made a trip to TJ Maxx and scored three cookbooks at an amazing price-The Martha Stewart Living Cookbook-The Original Classics, The Martha Stewart Living Cookbook-The New Classics, and Martha Stewart's Cooking School. Whenever I get a new cookbook, I go through it page by page, bookmarking recipes that I'd like to try with Post-It notes. So far I've gone through the two Martha Stewart Living cookbooks, and I'll flip through Martha Stewart's Cooking School soon. A lot of techniques in the book are ones I'm well-acquainted with, but I'm hoping that I'll pick up a few tips and good recipes. Here's the first of many recipes I'll be trying out from my new cookbooks.

Blueberry Corn Muffins
from The Martha Stewart Living Cookbook-The Original Classics

makes 6 muffins

Note: You will need six 2 3/4x2-inch pastry rings, which gives these muffins a unique shape. Jumbo or oversize muffin tins can also be used. Frozen blueberries may be used instead of fresh.

1 c. (2 sticks) plus 2 T. unsalted butter, room temperature
3/4 c. sugar, plus 2 T. for sprinkling
3 T. honey
2 large eggs
3 c. all-purpose lfour
1 c. yellow cornmeal
1 T. plus 1/2 t. baking powder
1/2 c. milk
1 c. blueberries

1. Preheat the oven to 375 degrees F with a rack in the center. Line a baking sheet with parchment paper; place six 2 3/4x2-inch pastry rings on it. Cut a sheet of parchment into six 10x3-inch strips; use them to line the rings (the paper will extend above the rims).

2. Place the softened butter, 3/4 c. sugar, and the honey in the bowl of an electric mixer fitted with the paddle attachment. beat on medium speed until fluffy, about 1 minute. Add the eggs; beat one minute more.

3. Whisk the flour, cornmeal, and baking powder together in medium bowl; add to the butter mixture in the mixer bowl. Beat until combined. Slowly pour in the milk, beating on low, just until combined. Fold in the blueberries. Divide the dough among the rings (do not pack too firmly; each will take about 1 cup). Brush the tops with cold water; sprinkle 1 t. sugar over each.


4. Bake until the tops are browned and a cake tester inserted in the center of a muffin comes out clean, about 30 minutes. Let cool in the pans 5 minutes. Tie kitchen twine around the muffins to hold the parchment in place, if desired, or remove the parchment. Serve immediately.

Thursday, March 4, 2010

Chicken Curry


And yet another recipe from Cooking Light! This recipe is healthy, inexpensive, and quick enough to make on a worknight. If you're not a fan of red curry, try using another type of curry paste instead.

Since this is an extremely basic curry recipe, it leaves lots of room for experimentation. Next time I'm at least going to add some onions in with the green peppers, but I have a lot of other things in mind too.

Chicken Curry
from Cooking Light, March 2010

1 T. canola oil
3 (6-ounce) skinless, boneless chicken breast halves, cut into 1-inch pieces
1/2 t. salt
2 c. green bell pepper strips (about 1 large)
2 T. fresh lime juice
2 T. less-sodium soy sauce
2 T. red curry paste
1 t. sugar
1 (14-ounce) can light coconut milk
3 c. hot cooked long-grain rice (I used brown)
Lime wedges (optional)


1. Heat a large nonstick skillet over medium-high heat. Add oil to pan; swirl to coat. Sprinkle chicken even with salt. Add chicken to pan; cook 6 minutes or until browned, turning once. Add bell pepper to pan; saute 4 minutes, stirring occasionally. Remove chicken mixture from pan.
 
2. Combine juice, soy sauce, curry paste, and sugar in a small bowl, stirring with a whisk. Add juice mixture and coconut milk to ban; bring to boil. Cook 12 minutes or until slightly thick. Return chicken to pan; cook 2 minutes or until thoroughly heated. Serve over rice.

Monday, March 1, 2010

Spicy Chicken Fried Rice with Peanuts


This recipe is courtesy of Ellie Krieger and comes the March 2010 issue of Cooking Light magazine. In addition to looking tasty, I'm glad this recipe will help me use up some of the green onions I'm growing that have gotten too tall to support their own weight. This recipe requires quite a bit of prep work, but cooks really quickly once you have your mise-en-place finished and are ready to go.

Spicy Chicken Fried Rice with Peanuts
from Cooking Light, March 2010

makes 5 servings

1/4 c. less-sodium soy suace
1 T. dark brown sugar
1 t. dark sesame oil
3/4 t. crushed red pepper
2 T. canola oil
2 c. diced red bell pepper (about 2)
1 c. diced onion
1/4 c. thinly sliced green onions
2 T. minced peeled fresh ginger
2 large garlic cloves, minced
5 c. cold cooked brown rice
2 c. diced cooked chicken (about 1 lb)
1 (8-ounce) can sliced water chestnuts, drained and chopped
1/3 c. chopped, unsalted, dry-roasted peanuts

1. Combine the first 4 ingredients in a small bowl, stir well with a whisk.

2. Heat canola oil in a wok or large nonstick skillet over medium-high heat. Add bell pepper, diced onion, and 2 T. green onions to pan; stir-fry for 3 minutes or until tender. Add ginger and garlic; stir-fry 1 minute. Add rice, chicken, and water chestnuts; stir-fry for 5 minutes or until thoroughly heated, stirring gently. Add soy sauce mixture; cook 2 minutes, tossing gently to coat. Sprinkle with remaining 2 tablespoons green onions and peanuts.