Sunday, January 27, 2013

Granola Bars


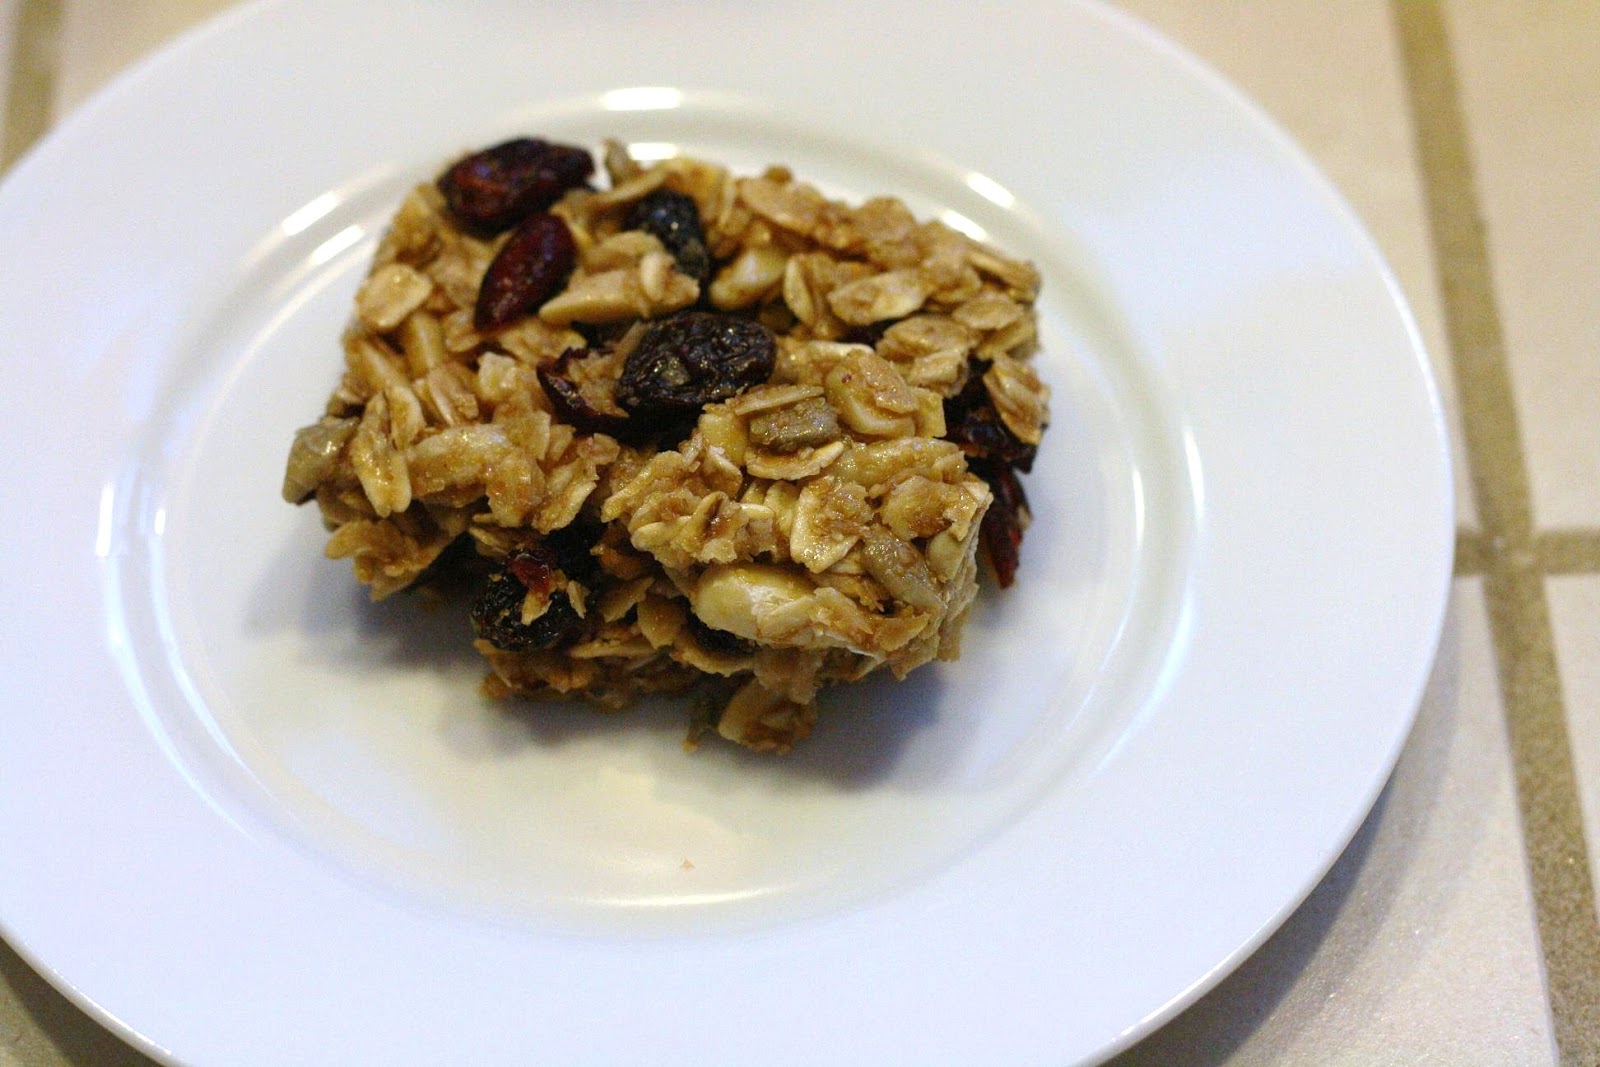
There are countless good commercial granola bars out there (Kashi, Clif, Luna, Cascadian Farms, Nature Valley, etc.), but nothing quite compares to the homemade variety. In the same way that the chocolate chip cookie just out of the oven is always going to be best, a fresh, homemade granola bar is going to blow the commercial variety out of the water. Most granola bars are constructed from a combination of oats, seeds or nuts, and dried fruit, and these granola bars strike a particularly good balance of all those elements. The layered sweetness comes from a combination of light honey and deep dark brown sugar, each contributing nuanced flavor in addition along with the requisite sugar content. The pairs of grains (oats and wheat germ), seeds and nuts (sunflower seeds and almonds), and dried fruit (cranberries and raisins, as I made them), make each bite unique so there's no danger you'll get sick of them before the batch disappears. Striking a nice balance between crunchy and chewy, any extras can be frozen without too much loss of texture upon thawing. Simple, healthy, and delicious, if you've got the time for a little culinary project, these are certainly worth the effort.

Granola Bars
adapted from Alton Brown
makes 16 (2-inch) squares

8 ounces old-fashioned rolled oats, approximately 2 cups
1 1/2 ounces raw sunflower seeds, approximately 1/2 cup
3 ounces sliced or slivered almonds, approximately 1 cup
1 1/2 ounces wheat germ, approximately 1/2 cup
6 ounces honey, approximately 1/2 cup
1 3/4 ounces dark brown sugar, approximately 1/4 cup packed
1 ounce (2 tablespoons) unsalted butter, plus extra for pan
2 teaspoons vanilla extract
1/2 teaspoon kosher or sea salt
6 1/2 ounces chopped dried fruit, any combination of cranberries, raisins, apricots, cherries, or blueberries

1. Preheat the oven to 350 degrees F. Line a 9 by 9-inch glass or metal baking dish with a foil sling. Coat with butter or spray with cooking spray and set aside.

2. Spread the oats, sunflower seeds, almonds, and wheat germ onto a half-sheet pan. Place in the oven and toast for 15 minutes, stirring occasionally.

3. In the meantime, combine the honey, brown sugar, butter, extract and salt in a medium saucepan and place over medium heat. Cook until the brown sugar has completely dissolved.

4. Once the oat mixture is done, remove it from the oven and reduce the heat to 300 degrees F. Immediately add the oat mixture to the liquid mixture, add the dried fruit, and stir to combine. Turn mixture out into the prepared baking dish and press down, evenly distributing the mixture in the dish and place in the oven to bake for 25 minutes. Remove from the oven and allow to cool completely. Cut into squares and store in an airtight container for up to a week.

Thursday, January 24, 2013

Chicken Tacos with Smoky BBQ Cabbage Slaw


The fact that I hate to waste is often a source of inspiration. I won't hold back on picking up particular ingredients, but I certainly won't let odds and ends go unused. This recipe, for example, came from a desire
to use up the corn tortillas left over from Black Bean Enchiladas with Spicy Squash Sauce and a seemingly endless head of red cabbage still remaining from my CSA. But despite it's humble origins, this dish doesn't disappoint in terms of flavor even though it only requires a small time investment. High-quality prepared barbecue sauce is the real shortcut here, taking an ordinary collection of vegetables from raw and plain to tender and flavorful in short order. A zesty sauce is best, complemented particularly well by the smoky cheddar, fresh cilantro and cooling sour cream. I made this as a quick meal for two, but it could easily be scaled up for a taco bar at a larger gathering, perhaps served alongside the fish taco recipe with cabbage slaw I created out of the same motivation (and will share soon). A great example of making lemonade out of leftover lemons, these tacos are delicious enough to earn an intentional spot on my menu in the future.

Chicken Tacos with Smoky BBQ Cabbage Slaw
serves 2

One 6- to 8-ounce boneless, skinless chicken breast
Cooking spray or canola oil
Salt and freshly ground black pepper
4 ounces finely shredded red cabbage
1/2 medium onion, sliced (about 2 ounces)
1/4 cup fresh corn or frozen corn, thawed
2 tablespoons barbecue sauce, diluted with 2 tablespoons water
4 small corn tortillas
Chopped fresh cilantro, for serving
Shredded smoked cheddar cheese (or other cheddar or Jack cheese), for serving
Sour cream, for serving

1. Preheat a pan to medium heat and spray with cooking spray or drizzle with canola oil. Season chicken with salt and pepper and add to pan. Cook until breast reaches 170 degrees F. Remove chicken from pan and allow to rest for a few minutes, then cut or shred into bite-size pieces.

2. Add additional oil to the hot pan, if needed, and add onions. Cook, stirring frequently, until onions are browned and just softened, about 5 minutes. Add cabbage, raise heat to medium-high and cook, stirring frequently, until cabbage is softened but still somewhat crisp, about  3 to 5 more minutes. Add corn, stirring constantly until corn is heated through. Add 3 tablespoons of the diluted barbecue sauce, and continue to cook, stirring constantly, until all the vegetables are coated most of the liquid has been absorbed. Remove pan from heat, add remaining tablespoons of diluted barbecue sauce, and stir to combine everything thoroughly.

3. Warm corn tortillas in the oven or microwave. Add cabbage slaw to each tortilla and top with chicken, cheese, cilantro and sour cream. Serve promptly.

Tuesday, January 22, 2013

Black Bean Enchiladas with Spicy Squash Sauce


Of all the things I've made in an effort to use up ridiculous amount of squash puree in my freezer, this has to be my favorite. Sadly, it's not because of the inherent squashiness of the dish, but the way in which it brings all the other ingredients together so perfectly. Squash puree is a fantastic shortcut to a lush sauce, able to blend with all manner of ingredients without dominating the flavor. Though this may not be the kind of authentic fare that will show up in a Rick Bayless cookbook, there's no denying that the silky and subtly sweet squash is an ideal foil for spicy jalapenos and chili powder. Add a hearty black bean filling and a savory frosting of cheese and you've got a crowd-pleasing meal as suitable to Meatless Monday as it is to a celebratory feast. Even better, this meal freezes wonderfully, so make up a double batch to be ready to feed the masses any time.

Black Bean Enchiladas with Spicy Squash Sauce
adapted from Martha Stewart
serves 4

One 15-ounce can seasoned black beans, drained and rinsed
1/2 cup fresh corn or frozen corn, thawed
6 scallions, thinly sliced
Coarse salt and ground pepper
1 1/2 cups butternut or other winter squash puree
4 cloves garlic, peeled
1 jalapeno chile, quartered (remove ribs and seeds for less heat, if desired)
1 teaspoon chili powder
8 corn tortillas (6-inch)
1 cup grated sharp or smoked cheddar cheese (4 ounces)

1. Preheat oven to 425 degrees. In a medium bowl, combine beans, corn, and scallions. Season generously with salt and pepper; set aside.

2. In a blender, puree squash, garlic, jalapeno, chili powder, 1 1/2 cups water, 1 teaspoons salt, and 1/4 teaspoon pepper until smooth (hold top firmly as blender will be quite full). Taste sauce and season to taste with additional salt and pepper. Pour 1 cup of sauce in the bottom of an 9x13-inch baking dish.

3. Lay tortillas on work surface; mound black bean mixture on half of each tortilla, dividing evenly. Roll up tortillas; place, seam side down, in baking dish.

4. Pour remaining sauce on top; sprinkle with cheese. Place dish on a baking sheet; bake until cheese is golden and sauce is bubbling, 25 to 30 minutes. Let cool 5 minutes before serving.


Sunday, January 20, 2013

Carrot Date Muffins


Although I do indulge in culinary trends from time to time, I haven't jumped on the gluten-free bandwagon. There are plenty of people out there without a gluten intolerance that think going gluten-free is somehow healthier, but I'm certainly not one of them. That being said, if I come across something delicious that also happens to be gluten-free, I won't pass it up. Thanks to Good to the Grain, I have a deep appreciation (and large store) of less-than-mainstream flours. When I woke up New Year's Day in the mood to bake up some breakfast, I had everything I needed already in the pantry to make these coincidentally gluten-free muffins. Although they are a bit denser than ones I would typically make using whole wheat pastry flour, the lovely flavor of the almond flour makes up for the difference in texture. Carrots, dates, and maple syrup create a complex sweetness, combining beautifully with the rich nuts, aromatic spices, and tropical hint of the coconut oil. Naturally most delicious fresh from the oven, extras can be frozen so a quick breakfast is always at the ready. Whether you're going gluten-free or not, these muffins will get your day started right.

Carrot Date Muffins
adapted from Whole Foods Market
makes 12 muffins

2 medium carrots, peeled and coarsely chopped
1 cup chopped pitted dates
1/2 cup chopped toasted walnuts or pecans
1/4 cup melted virgin coconut, high-heat sunflower oil, or canola oil
2 eggs, lightly beaten
1/4 cup plus 2 tablespoons pure maple syrup
3/4 cup amaranth flour or millet flour
3/4 cup ground almond flour
2 teaspoons baking powder
1/2 teaspoon ground cinnamon
1/2 teaspoon freshly grated nutmeg
1/2 teaspoon sea salt

1. Line 12 muffin cups with paper liners or oil with natural cooking spray and set aside. Preheat oven to 375°F. Place carrots and dates in the bowl of a food processor. Pulse and then blend until finely chopped. Add walnuts and pulse to finely chop. Transfer to a bowl; add oil, eggs and maple syrup, stir to combine completely.

2. In a separate bowl, combine all remaining dry ingredients. Pour liquid ingredients over dry ingredients and stir until just combined. Spoon batter into prepared muffin tins and bake for 20 to 25 minutes or until a toothpick inserted in the center of a muffin comes out clean. Cool on a wire rack.

Thursday, January 17, 2013

Roasted Beet, Orange, and Goat Cheese Salad


As lame as it may sound, Roasted Beet and Potato Borscht got me really excited about beets. Thus armed with a new-found love for the roasted variety, I turned to one of my favorite canvases for recipe creation - salad. I eat salad for lunch at least four times a week, so I have plenty of opportunity for experimentation and get geekily excited when I come up with something new. Since I'm married to someone who would prefer to subsist on meat and potatoes, I bring this recipe to you. Many of the salads I create are wonderful in any season, but roasted beets give this one the very essence of winter. Though I was never one to order or make anything with beets in the past, I knew that beet and orange was a tried-and-true combination and used it as a place to begin crafting my recipe. From there, the rest was a snap - add some red onion to cut through the sweetness of the beets and orange, and nuts and cheese for richness and saltiness and to make it filling enough for a main course. If a winter diet of too many root vegetables is weighing you down, use this recipe to lighten up a bit without losing the best flavor the season has to offer.

Roasted Beet, Orange, and Goat Cheese Salad
serves 1 (as a main dish)

2 ounces lettuce, mixed greens, or spinach (about 2 cups)
4 ounces beets, peeled and cut into small dice (a few small beets or 1/2 medium to large beet)
Extra-virgin olive oil
Kosher salt and freshly ground black pepper
1/4 small red onion, thinly sliced (about 0.5 ounce)
Clementine, satsuma, or half of a small regular or blood orange, cut into bite-size pieces (about 2 ounces)
1/4 cup/1 ounce crumbled goat or feta cheese
2 tablespoons/0.5 ounce toasted chopped walnuts or pistachios

1. Preheat oven to 450 degrees F. Toss beets with olive oil, salt, and pepper and arrange in an even layer on a baking sheet. Roast until beets are tender and caramelized, about 20 to 30 minutes, depending on the size of the pieces.

2. Arrange greens on a large plate, and top with onion, beets, oranges, cheese, and nuts. Drizzle with dressing of choice and enjoy!

Tuesday, January 15, 2013

Baked Winter Squash Pasta with Parmesan Croutons


Now that I've either eaten or preserved most of my winter CSA vegetables, save for some potatoes, carrots, and onions, I'm working on tackling the massive stores of frozen squash puree in my freezer. While I love squash flavor, especially pumpkins and butternut, squash puree can also seamlessly blend into sauces without becoming the dominant flavor. In this scrumptious pasta dish, its subtle sweetness and silky texture is the perfect canvas for pungent Parmesan cheese and fresh rosemary, creating a grown-up mac and cheese that you might even be able to convince the kiddos to eat. Although I always choose whole grain pasta over one made with white flour, I think the nuttiness of whole grain pasta is a particularly good complement to both the squash and Parmesan, an under-appreciated palate in its own right. My first choice of squash would be butternut, but acorn, festival, or nearly any other winter squash would work also nicely. Despite a relatively short list of ingredients, the flavor of this meal is surely more than the sum of its parts. Be it Meatless Monday or date night, this sophisticated blend of vegetables, whole grains and cheese is a hearty bowl of comfort any winter night.

Baked Winter Squash Pasta with Parmesan Croutons
adapted from Martha Stewart's Everyday Food
serves 4

Cooking spray, for baking dish
2 tablespoons extra-virgin olive oil
1 large onion, halved and thinly sliced
Coarse salt and ground pepper
1 teaspoons chopped fresh rosemary leaves
8 ounces small whole wheat pasta (penne, rotini, shells, etc.)
1/2 package (6 ounces) frozen winter squash puree, thawed
1/2 cup grated Parmesan cheese
1 baguette or whole grain bread, cut into 1/4-inch cubes (about 2 ounces)

1. Preheat oven to 400 degrees. Spray a 8- or 9-inch square baking dish with cooking spray. Heat 1 1/2 tablespoons oil in a large skillet over medium-low heat. Add onions; season with salt and pepper. Cover; cook until onions are soft and release liquid, 10 minutes. Uncover; raise heat to medium. Cook, stirring, until onions are browned, 20 to 25 minutes total. Stir in 1/2 teaspoon rosemary.

2. Meanwhile, cook pasta in large pot of boiling salted water 2 minutes less than package instructions suggest. Drain, reserving 1 cup  cooking water. Return pasta to pot.

3. Stir squash and reserved pasta water into onions; simmer 2 minutes. Toss squash mixture and 1/4 cup Parmesan with pasta. Transfer to prepared dish.

4. Combine bread cubes with remaining Parmesan, rosemary, and oil; season with salt and pepper. Top pasta with bread cubes; bake until golden brown, 10 to 15 minutes.

Sunday, January 13, 2013

Surfer's Granola


For a while, I'd gotten into the bad habit of buying granola. I know that it's cheap and easy to make, but I'd gotten caught up in other projects (namely homebrewing) and abandoned my habit of making all my own granola and granola bars. And although I maintain a dedication to the fermented arts, I also made a New Years' resolution to get back into the habit of stocking my pantry and freezer with the fruits of my own labor. I've had this recipe bouncing around in the back of my head since I originally saw it in Bon Appetit and thought there no better time to conquer long-neglected tasks than the first week of the New Year. I don't much buy in to the idea of having to make goals and or better yourself on any sort of set schedule, but I do adore ritual and tradition and the psychological boost of a clean slate. And so I started off my year with a number of culinary efforts, including this granola. I've made many fruit and nut granolas, but this one distinguishes itself with a pleasant added crunch from the millet and unique texture. By first soaking the oats with hot water and then baking low and slow, you form delightfully crunchy shards of granola in all shapes and sizes. It's true that baking the nuts and oats separately requires more time and effort that the typical granola where they're all baked together at a higher temperature, but it's well worth it for the new sensory experience. Whether sprinkled generously over yogurt for breakfast or ice cream for dessert, this granola will delight your taste buds with salty, sweet, crunchy, and soft in each delicious bite.

Surfer's Granola
adapted from Bon Appetit
makes about 1 quart

2 cups old-fashioned oats
1/4 cup millet (optional; if not using, add an extra 1/4 cup oats)
1 tablespoon golden or other flaxseeds (optional)
3/4 teaspoon kosher salt, divided
1/2 teaspoon ground cinnamon
1/4 teaspoon ground ginger
1/3 cup honey
4 tablespoons extra-virgin olive oil, divided
2 tablespoons (packed) dark brown sugar
3/4 raw almonds, coarsely chopped
1/3 cup raw shelled pumpkin seeds (pepitas)
1/3 cup raw sunflower seeds
1 tablespoon dark brown sugar
1/2 cup raisins or dried cranberries

1. Heat oven to 300°. Mix oats, millet and flaxseeds (if using), 1/4 tsp. salt, cinnamon, and ginger in a medium bowl. Add 1 cup hot tap water. Mix thoroughly and let stand for 15 minutes to soften oats.

2. Bring honey, 2 Tbsp. oil, and brown sugar to a boil in a small saucepan, stirring to dissolve sugar. Add honey mixture to oat mixture in bowl and toss to coat. Spread out in an even layer on a large rimmed baking sheet.

3. Bake oat mixture, stirring 2–3 times, until dark golden brown, 50–70 minutes. Place sheet on a wire rack and let oat mixture cool completely.

4. Increase oven temperature to 350°. Mix remaining 1/2 tsp. salt, remaining 2 Tbsp. oil, almonds, pumpkin and sunflower seeds, and sugar in a medium bowl. Spread in an even layer on another rimmed baking sheet. Bake, stirring occasionally, until golden brown, 12–15 minutes. Place sheet on a wire rack and let nut mixture cool completely.

Combine oat mixture, nut mixture, and raisins in a large bowl.