Pages

Wednesday, June 27, 2012

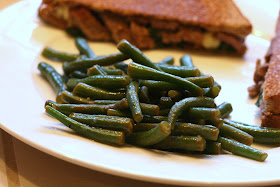
Citrus Green Beans


Sometimes the key to being a good cook is stepping away from all the fancy ingredients and elaborate techniques. It's easy to throw some bacon or a dash of truffle oil on almost anything, but when the ingredients are truly spectacular, it's really not necessary. Green beans have recently started to appear at the farmers' market and they are one of veggies I most look forward to coming in season. I can never make it through trimming all the beans without sneaking a few myself, a sure sign that there's not much needed to turn them into a truly spectacular dish. Crisp-tender green beans are dressed by a touch of toasty walnut oil, balanced by a bright pop of lemon. I happen to be an avid collector of oils and vinegars, but if you don't have walnut oil, olive, almond, toasted sesame, or even just canola or safflower oil will leave you with a fantastic dish. Be sure to toss the green beans with the dressing while the beans are still warm so the flavors soak in, but this side can be enjoyed warm, at room temperature, or even cold. A perfect companion to nearly any protein, this simple summer side can happily find a place at your summer dinner party, cookout, or average evening at home.

Citrus Green Beans
from Whole Foods
serves 8 to 10

2 pounds green beans, trimmed
2 tablespoons walnut oil
3 tablespoons canola or safflower oil
Juice of 1 lemon
1 teaspoon grated lemon zest
Sea salt
Freshly ground black pepper

1. In a large saucepan of boiling salted water, cook green beans until just tender, 5 to 8 minutes. While they are cooking, whisk together both oils, lemon juice and zest. Drain beans and toss with dressing while still hot. Season with salt and pepper.
Sunday, June 24, 2012

Apple and Onion Fried Wild Rice

When I'm just tasked with feeding myself, fried rice is one of my go-to meals. A batch of rice can happily cook in my rice cooker while I'm chopping up whatever veggies happen to be lingering the fridge, and once all the prep work is done, it takes just a few minutes to whip up a big bowl of mock take-out deliciousness. The last time I went to whip up a batch I happened to have wild rice instead of my usual brown and I thought that this special ingredient warranted a little extra creativity. Wild rice always feels reminiscent of the harvest to me, which led me a naturally to apples and onions, both constants in my fridge. The sweetness of the apples and onions plays beautifully with nutty wild rice, all melded together with a rich coating of soy sauce-infused egg. I punched up my bowl of fried rice with a shot of Sriracha because I love heat, but it's still delightful in it's milder form. I was quite pleased with my first go-around with this recipe, but next time I may venture a little closer to tradition by using sesame oil instead of canola and adding ginger and garlic and see how well Asian flavors will meld with harvest flavors. Even if you're not interesting in trying this particular non-traditional variation on fried rice, I hope it at least inspires you to use fried rice as a palette for new creative combinations of your favorite ingredients.

Apple and Onion Fried Wild Rice
serves 1

2 eggs
1/2 tablespoon soy sauce, plus additional for serving
1/2 tablespoon canola oil
1/2 cup diced onion
1 cup diced apple
1 cup cooked wild or brown rice(or blend)
Sriracha or other hot sauce, for serving (optional)

1. In a small bowl, whisk eggs and soy sauce together. Meanwhile, heat oil in a pan over medium-high to high heat. Add onion and cook, stirring frequently, until onions are softened and a bit browned, 1 to 3 minutes. Add apples and cook, stirring frequently until the apples and onions are browned and softened, but not mushy, 1 to 2 minutes more.

2. Add rice, stir to combine, and cook until rice is heated through, about 30 seconds to 1 minute. Clear a well in the center of pan, adding additional oil if necessary to prevent sticking, and add egg-soy mixture to the pan. Stir mixture constantly, coating rice-vegetable mixture with the egg, and cook until egg is set, but not dry, about 1 minute.

3. Remove pan from heat, transfer mixture to a plate or bowl, and serve with additional soy sauce and Sriracha, if desired.

Wednesday, June 20, 2012

BBQ Chicken Apple Melts

In the last few years sandwich-making has really become an art. Moms will always make PB&J and a good neighborhood deli is always a thing of beauty, but now even the finest of ingredients will find their way into the humble sandwich. That being said, even if you're not making your own aiolis or nestling foie gras between slices of local artisan bread, the sandwich is still a great way to get creative when you're short on time to make a meal, exactly how this sandwich came to me. I've always got a to-do list a mile long, but I'm simply can't tackle it with just proper sustenance. I only had a notion of making some sort of grilled chicken sandwich for dinner, but a quick look in my fridge revealed a few common ingredients that provided the makings for this fantastic melt. I'm the first to say that this isn't revolutionary by any means, but who can say no to a combination of moist chicken, sweet onions and apples, and tangy barbecue sauce under a blanket of melted cheese? Not only is it wonderfully savory and satisfying, but it's a great way to sneak in a few fruits and vegetables for those who might otherwise be a bit produce-averse. Although perfectly delicious as is, turkey would happily substitute for chicken, pears for apples, honey mustard for barbecue sauce, with almost any cheese oozing over the top. A basic recipe with a lot of possibilities, I hope this recipe not only fills you up, but starts you on a path of culinary creativity.

BBQ Chicken Apple Melts
serves 2

8 ounces boneless, skinless chicken breast
Canola oil cooking spray
Salt and freshly ground black pepper
1 tablespoon butter or canola oil
1 small onion, sliced
1 small Granny Smith apple, thinly sliced
1/4 cup barbeque sauce, plus additional for serving
4 slices whole wheat bread
2 ounces smoked or sharp cheddar cheese

1. Preheat a pan over medium heat. Spray chicken breast lightly with oil and season with salt and pepper. Cook until internal temperature reaches 170 degrees F. Remove from heat and allow to rest for at least five minutes. Shred or thinly slice chicken.

2. Meanwhile, preheat a frying pan over medium heat. Add butter or oil and once hot, add onions and season with salt and pepper. Cook, stirring frequently for until onions are slightly softened, about 5 minutes. Add apples and continue cooking over medium heat until onions and apples are soft, but not mushy, about 10 to 15 minutes total. Remove from heat.

3. Preheat a panini press (I love my Cuisinart Griddler) according to manufacturer's directions (or preheat a large skillet over medium heat). While preheating, combine chicken, apple and onion mixture, and barbecue sauce in a bowl and mix thoroughly to combine. Divide evenly between two slices of bread, topping each with half of the cheese and the second slice of bread.

4. Grill until cheese is melted and chicken mixture is heated through. Serve warm with additional barbecue sauce on the side for dipping, if desired.

Sunday, June 17, 2012

Everyday Granola

One of my first culinary priorities once I got my kitchen unpacked in my new house was making granola. I'll confess to buying some commercial granola while in the midst of packing and moving, but I definitely felt a little guilty. It's so easy to make at home and overpriced in the store, that I can rarely justify picking up a bag. Despite an ever-growing list of house projects, I managed to set aside a little time early one Saturday morning a week after we moved in to make up a quick batch using a new recipe. Everyday Granola is the perfect name for this granola. It's a very classic recipe, customizable with any nuts or dried fruits you happen to have around the house, with just the right amount of sweetness and spice for breakfast. The combination of dark brown sugar and honey gives the granola character in addition to sweetness, with the spicy ginger and cinnamon playing perfectly against the sea salt. While I'm always on the search for bold and interesting new flavor combination, I have a great appreciation for solid, dependable recipes like this one that never disappoint and earn a constant place in my pantry. If you're looking to ease your way into making your own granola, this recipe is the perfect first step.

Everyday Granola
adapted from Bon Appetit, via Epicurious
makes about 5 cups

3 cups old-fashioned oats
1 cup coarsely chopped pecans
1/2 cup unsweetened shredded coconut
3 tablespoons (packed) dark brown sugar
3/4 teaspoon ground cinnamon
1/2 teaspoon ground ginger
1/4 teaspoon (generous) salt
1/3 cup honey
2 tablespoons canola oil
1 cup assorted dried fruit (raisins, cranberries, etc.)

1. Preheat oven to 300°F. Line rimmed baking sheet with parchment. Mix first 7 ingredients in large bowl. Stir honey and oil in saucepan over medium-low heat until smooth. Pour honey mixture over oat mixture; toss.

2. Spread on prepared sheet. Bake until golden, stirring every 10 minutes, about 40 minutes. Place sheet on rack. Stir granola; cool. Mix in fruit. DO AHEAD: Can be made 1 week ahead. Store airtight.

Wednesday, June 13, 2012

Ginger Shrimp, Sugar Snap Pea, and Corn Stir-Fry


Sugar snap peas are one of the things I most eagerly anticipate appearing at the farmers' market. Left to my own devices, I could probably eat a half-pound of fresh peas in one sitting, but they quite often make into stir-fries like this one. Shrimp is indelibly associated with sugar snap peas in my mind, needing only a generous sprinkling of red peppers and corn to complete this delicious and visually impressive meal. Healthy of portions of fresh and crunchy vegetables happily mingle with tender shrimp on a bed of rice (or noodles) in a subtly spicy sauce in this perfect summer meal. This stir-fry isn't particularly adventurous or unusual, but it is a wonderful collection of classic flavors that subtly accents the featured ingredients, letting them shine in the best possible light. In a move a bit off the beaten path, I served my stir-fry with wild rice (actually a grass) instead of my usual brown, a substitution I found immensely satisfying. Even more flavorful and texturally interesting than white or brown rice (though also more expensive), wild rice is a more complex accompaniment to stir-fry that I heartily recommend trying. Although there are surely many more stir-fry recipes to come as I impulsively buy vegetables at the farmers' market, I hope you enjoy this classic stir-fry to kick off a summer of bountiful produce.

Ginger Shrimp, Sugar Snap Pea, and Corn Stir-Fry
from Bon Appetit, via Epicurious
serves 4

1 pound uncooked large shrimp, peeled, deveined
2 tablespoons canola oil
3 teaspoons minced peeled fresh ginger
2 large garlic cloves, minced
1/2 teaspoon salt
1/4 teaspoon dried crushed red pepper
1 pound sugar snap peas, strings removed
1 cup fresh corn kernels (cut from about 2 ears)
1/2 cup diced red bell pepper
3 green onions, thinly sliced on diagonal
2 teaspoons black or white sesame seeds (optional)

1. Mix shrimp, 1 tablespoon oil, 1 1/2 teaspoons ginger, half of garlic, 1/2 teaspoon salt, and crushed red pepper in medium bowl. Let stand 1 hour.

2. Heat wok or large nonstick skillet over high heat. Add shrimp mixture; sauté until shrimp are just opaque in center, about 2 minutes. Transfer shrimp to bowl. Add 1 tablespoon oil to wok, then add sugar snap peas, corn, bell pepper, green onions, 1 1/2 teaspoons ginger, and remaining garlic. Stir-fry until vegetables are crisp-tender, about 3 minutes. Return shrimp and any accumulated juices from bowl to wok; stir-fry 1 minute longer. Season with salt and pepper. Sprinkle with sesame seeds and serve.

Sunday, June 10, 2012

Herbed Orzo with Peas


This was the first new recipe I tried in my new house. Inspired by the chive plants growing in my backyard (and to be honest, the fact that I had a bag of whole wheat orzo in the cabinet), I made this easy side I'd had bookmarked since even before I moved. Organizing a new house and working on  home improvement projects doesn't leave too much time for elaborate culinary creations, but I'm certainly not willing to give up healthy and flavorful meals just because I don't have as much free time as before.

This side is the height of simplicity, needing just your protein of choice to become a complete meal (in this case I made maple mustard glazed salmon). Nutty whole wheat orzo is the perfect canvas for fresh herbs and peas and savory Parmesan cheese, brought together with a bright splash of lemon juice, made rich and substantial with a generous splash of your best olive oil. Delicious warm, at room temperature, or even cool, this can be served at either a sit-down dinner or backyard barbecue, pairing effortlessly with almost any protein. Another recipe that's an ode to the season, there isn't a better time to give this recipe a try as a bounty of fresh peas floods the farmers' market.

Herbed Orzo with Peas
adapted from Martha Stewart
serves 4

1 cup whole wheat orzo
1/4 cup chopped fresh herbs, such as dill, chives, cilantro, or parsley
1 to 2 tablespoons fresh lemon juice
2 cups frozen or fresh peas
Extra-virgin olive oil (optional)
Freshly grated Parmesan, for serving (optional)

1. In a large pot of boiling salted water, cook orzo until al dente, adding peas during the last 2 to 3 minutes of cooking time.

2. Drain orzo and peas and transfer to a medium bowl. Add herbs and lemon juice and toss to combine. Season with to taste with salt and pepper and toss with olive oil and Parmesan cheese, if desired.

Wednesday, June 6, 2012

Roasted Asparagus and Mushroom Chicken Salad

Although I've been eating lots of main-course salads lately, I've been kind of stuck in a rut with my favorites. My husband and I have been in our new house for almost two weeks now, and although most things were unpacked just a few days after we moved in, I have a never-ending list of projects to tackle. Being able to throw together a tasty and nutritious meal quickly has been invaluable as I settle into my new house, but there hasn't been much time for creativity. Fortunately, not all my culinary inspirations require hours to realize (although I can't wait to make the most my new and much-improved kitchen), this simple salad being a prime example. The earthiness of the mushrooms is juxtaposesd perfectly by the fresh asparagus and salty, savory Parmesan cheese, made substantial by a generous helping of chicken. It's light enough for a summer main, but filling enough to be appropriate any time of the year. The vegetarian version of this salad is also delicious; the chicken can simply be omitted, but to make it hearty enough for a main course, walnuts are a great substitution.

As asparagus slowly fades from the farmers' market, chased by arrival of sugar snap peas, green beans, and other early summer bounty, I'll be happily indulging in the last of my favorite asparagus dishes, then gleefully moving on to a new round of culinary experiments. There's nothing more inspiring than the cornucopia of ingredients available in the farmers' market during the summer, and I can't wait to put my new kitchen to full use.

Roasted Asparagus and Mushroom Chicken Salad
serves 2

4 ounces cremini mushrooms, washed and sliced
4 ounces asparagus, cut into 1-inch pieces
Olive oil or olive oil cooking spray
Kosher salt and freshly ground black pepper
8 ounces boneless, skinless chicken breast
4 ounces mixed greens, spinach, or lettuce 
1 ounce freshly grated Parmesan cheese
Salad dressing, for serving

1. Preheat oven to 450 degrees F. In a large bowl, toss mushrooms and asparagus with olive oil, salt, and pepper. Spread in a even layer on a rimmed baking sheet and roast, tossing occasionally, until tender but not mushy, about 7 to 10 minutes.

2. Meanwhile, coat chicken breast lightly with oil and season with salt and pepper. Cook until internal temperature reaches 170 degrees F. Allow to rest for at least five minutes and then thinly slice or shred chicken.

3. Divide greens between two plates, topping each with half of the roasted asparagus, mushrooms,  and chicken. Top each plate with half of the Parmesan cheese and serve with dressing of choice.

Sunday, June 3, 2012

Green Cabbage and Apple Saute


Firing up the grill every weekend is an elemental part of my summer. Burgers, chicken, hot dogs, ribs, and seafood all get their turn during the summer, but brats are probably the things I cook out the most. Although I typically nestle my brat in a hearty bun, top it liberally with mustard, sauerkraut, and onions with a generous scoop of beans on the side, sometimes it's nice to mix it up by serving this cabbage and apple saute alongside. Cabbage, be it raw (as in coleslaw) or cooked (like this dish), is a very traditional side because its crunchiness and acidity provided the perfect foil for the rich and fatty sausage. Lemon juice and wine keep the cabbage bright and light and apples contribute just the right amount of sweetness and tartness, creating a meal that hits all your taste buds.

Another great thing about this side? It's equally appropriate at a casual backyard cookout around a picnic table or plated dinner in the dining room. Gathered outside with friends and family? Pour a glass of cold beer and dig in with abandon. Want to make it a little classier? Set the table, pour a glass of white wine, light a few candles and settle in for a dinner party or date night.

Green Cabbage and Apple Saute
from Food and Wine
serves 6

One 3-pound head of green cabbage—halved, cored and coarsely shredded (12 cups) 
1 cup Riesling 
2 tablespoons fresh lemon juice 
1 1/2 tablespoons sugar 
1/4 cup extra-virgin olive oil 
1 large onion, thinly sliced 
2 Granny Smith apples—peeled, halved, cored and sliced 1/8 inch thick 
Salt and freshly ground pepper 

1. In a large bowl, toss the cabbage with the wine, lemon juice and sugar. Let marinate for 1 hour, tossing often.

2. In a large deep skillet, heat the olive oil. Add the onion and cook over moderate heat until golden, about 8 minutes. Add the cabbage and its marinade and cook over moderately high heat, tossing, until wilted, about 5 minutes. Cover and cook over moderately low heat, stirring occasionally, until almost tender, about 20 minutes. Add the apples and toss well. Cover and cook, stirring occasionally, until the apples are just tender, about 10 minutes. Season with salt and pepper and serve.