Pages

Saturday, February 27, 2010

Triple-Chocolate Chunk Cookies


After trying out the America's Test Kitchen chocolate chip cookie recipe last weekend, I was thinking of trying the Better Homes and Gardens chocolate chip cookie recipe, to continue studying chocolate chip cookie recipes. Flipping through the Better Homes and Gardens New Baking Book, I stumbled across this recipe and decided to try it instead.

These are cookies have a brownie-like consistency and are extremely moist. Even only one of these cookies should to satisfy a chocolate enthusiast.

Triple-Chocolate Chunk Cookies
from the Better Homes and Gardens New Baking Book

1 c. butter
3/4 c. granulated sugar
3/4 c. packed brown sugar
1 t. baking soda
2 eggs
1 t. vanilla
3 oz. unsweetened chocolate, melted and cooled
2 c. all-purpose flour
8 oz. semisweet chocolate, cut into 1/2-inch pieces or 1 1/3 c. large semisweet chocolate pieces
6 oz. white baking bar, cut into 1/2-inch pieces or 1 c. white baking pieces
1 c. black walnuts or pecans (optional)

1. Lightly grease a cookie sheet; set aside. In a large mixing bowl beat butter with an electric mixer on medium to high speed for 30 seconds. Beat in granulated sugar, brown sugar, and baking soda until combined. Beat in eggs and vanilla until combined. Stir in melted chocolate. Beat in as much of the flour as you can with the mixer. Stir in any remaining flour. Stir in chocolate and white baking pieces, and if desired, nuts.

2. Using a 1/4-cup dry measure or scoop, drop mounds of dough about 4 inches apart on the prepared cookie sheet.

3. Bake in a 350 degree F oven for 12 to 14 minutes or until edges are firm. Cool on a cookie sheet for 1 minute. Transfer cookies to a wire rack; let cool.

Friday, February 26, 2010

Brown Soda Bread


Soda bread is simply bread where bread soda (more commonly known as baking soda or sodium bicarbonate) is used in lieu of yeast as a leavening agent. Traditional soda bread is made from flour, baking soda, salt, and buttermilk. The lactic acid in buttermilk reacts with the baking soda to form bubbles of carbon dioxide and cause the bread to rise.

With St. Patrick's Day only a few weeks away, many people will be making Irish soda bread as part of their celebration. Cooking Light has a wonderful bunch of St. Patrick's Day themed recipes in the March issue, and this recipe comes from there. This recipe is much more complex than traditional soda bread, but is also much healthier.

This recipe calls specifically for steel-cut oats (also called Irish oatmeal)-do not substitute quick oats or old-fashioned rolled oats. Steel-cut oats are processed much less than rolled oats, the groat only being cut into 2 or 3 pieces instead of being rolled, and thus take longer to prepare for oatmeal. They are chewier and nuttier than rolled oats and have a lower glycemic index. Unfortunately, at least at the grocery store I went to, they are also significantly more expensive.

For once I actually weighed my flour instead of just using measuring cups. I know that weighing is more accurate, but I rarely do it. I didn't own a kitchen scale until just a few years ago, so I was always in the habit of measuring instead of weighing.

Note: If you try and find this recipe on the Cooking Light website, a different brown soda bread recipe comes up. The Bacon and Butternut Squash Pasta recipe was not available either (it's called bacon and butternut pasta in the magazine), so it seems the current issue's recipes are not available online yet.

Despite being mostly whole-wheat flour, this bread is moist and delicious and has a wonderful nutty flavor from the steel-cut oats. And, even better, it's extremely healthy!

Brown Soda Bread
Cooking Light, March 2010

Cooking spray
11.25 oz. (about 2.5 c.) whole-wheat flour
2.25 oz. (about 1/2 c.) all-purpose flour
1/2 c. steel cut-oats
2 T. brown sugar
1 T. wheat germ
1 t. baking soda
1 t. baking powder
1/ 2 t. salt
2 c. low-fat buttermilk (I used powdered)
1 large egg, beaten slightly

1. Preheat oven to 325 degrees F.

2. Coat a 9x5-inch loaf pan with cooking spray. Line the pan with parchment paper and coat with cooking spray.

3. Weigh or lightly spoon flours into dry measuring cups, and level with a knife. Combine flours and next 6 ingredients (though salt). Combine buttermilk and egg; add to flour mixture. Stir until just combined.
 

4. Spoon the mixture into prepared pan. Bake at 325 degrees for 1 hour and 5 minutes or until a wooden pick inserted in center comes out clean. Invert bread onto a wire rack; cool completely. Remove parchment; slice bread into 12 slices.


Wednesday, February 24, 2010

Bacon and Butternut Squash Pasta


Every time I get a new issue of Food and Wine or Cooking Light, I go through page by page marking each recipe I want to try with a Post-It note. Most months I don't get to even half of the bookmarked recipes, but I definitely try. I'm working on incorporating more vegetarian dishes and those very light in meat into my diet, and this dish fits the bill. It also gives me the opportunity to use the green onions I've been growing in my apartment and to eat butternut squash, a vegetable I don't have often enough.

Many people seem to have an aversion to blue cheese, either because the taste and/or smell is too pronounced or they don't like the concept of visible mold streaked throughout (penicillium, in case you're interested). If this is the case, I would suggest feta or queso fresco as a substitute, although the blue cheese taste is very subtle in this dish and I don't think most people would know it had blue cheese unless you told them.

I was surprised at how such an odd combination of ingredients made an absolutely delicious dinner. This will most definitely be made again at my house. In addition being delicious, it's also quite inexpensive, a big bonus in my book.

Bacon and Butternut Squash Pasta
from Cooking Light, March 2010

yields 4 servings

3 1/4 t. salt, divided
8 oz. uncooked fettuccine
2 bacon slices
2 T. butter
3 c. (1/2-inch) cubed, peeled butternut squash
2 garlic cloves, minced
1/2 c. (2 oz.) crumbled blue cheese
1/2 c. sliced green onions

1. Bring 3 quarts water and 1 T. salt to a boil in a large saucepan. Add pasta; cook for 8 minutes. Drain in a colander over a bowl, and reserve 1/3 c. cooking liquid.

2. Cook bacon in a large skillet over medium heat until crisp. Remove bacon from pan, reserving 2 t. drippings in pan. Crumble bacon; set aside. Add butter to drippings in pan; cook 30 seconds or until butter melts. Increase heat to medium-high. Add squash; saute 7 minutes or until almost tender. Add garlic; cook 1 minute, stirring constantly. Stir in remaining 1/4 t. salt, pasta, reserved cooking liquid, and cheese; cook 2 minutes or until pasta is al dente, stirring frequently. Sprinkle with bacon and onions.

Saturday, February 20, 2010

Thick and Chewy Chocolate Chip Cookies


I made a New Year's Resolution to try at least one new recipe a week this year, which usually isn't a problem, but so far this week I've only made tried-and-true recipes and really quick and easy stuff for dinner. I was flipping through the America's Test Kitchen Family Baking Book today as I was watching America's Test Kitchen and decided that today was the day to try out their chocolate chip cookie recipe. My go-to chocolate chip cookie recipe as of late is the famed New York Times chocolate chip cookie recipe, but that requires at least a day to let the dough rest, thus preventing whipping up a quick batch when the mood strikes. This recipe was created by America's Test Kitchen after the NY Times recipe came out (I've see the America's Test Kitchen episode where the discuss it), and they believe that it's an improvement, although I'm not sure I agree.

The secrets to making these cookies chewy are melted butter, an extra egg yolk, and slightly underbaking the cookies and letting them finish baking on the hot baking sheet for 10 minutes. Do not take the cookies off the cookie sheets early.

The most important part of a good chocolate chip cookie, at least in my opinion, is the chips. While Nestle morsels will do, my personal preference is Ghiradelli 60% Cacao chocolate chips. These are widely available at grocery stores, but are significantly more expensive than Nestle or store brand chocolate chips. I get mine in 3 lb. bags at Sam's Club where they are much cheaper.

My final verdict on this recipe: better than the recipe on the back of the chocolate chip bag, but not quite as good as the New York Times chocolate chip cookie recipe. But when you want to whip up a batch on the spot, this recipe is wonderful.

Thick and Chewy Chocolate Chip Cookies
from the America's Test Kitchen Family Baking Book

2 c. plus 2 T. (10 2/3 oz.) all-purpose flour
1/2 t. baking soda
1/2 t. salt
12 T. (1 1/2 sticks) unsalted butter, melted and cooled
1 c. packed (7 oz.) light brown sugar
1/2 c. (3 1/2 oz.) granulated sugar
1 large egg
1 large egg yolk
2 t. vanilla extract
1 1/2 c. (9 oz.) semisweet chocolate chips

1. Adjust an oven rack to the lower-middle position and heat the oven to 325 degrees F. Line 2 large baking sheets with parchment paper. Whisk the flour, baking soda, and salt together in a medium bowl.

2. In a large bowl, beat the melted butter and sugars together with an electric mixer on medium speed until smooth, 1 to 2 minutes. Beat in egg, egg yolk, and vanilla until combined, about 30 seconds, scraping down the bowl and beaters as needed.

3. Reduce the mixer speed to low and slowly add the flour mixture until combined, about 30 seconds. Mix in the chips until incorporated.

4. Working with 2 tablespoons of dough at a time, roll the dough into balls and lay them on the prepared baking sheets, spaced about 2 inches apart. Bake the cookies, one sheet at a time, until the edges are set and beginning to brown but the centers are still soft and puffy, 15 to 20 minutes, rotating the baking sheet ahdlway through baking.
 
 
 5. Let the cookies cool on the baking sheet for 10 minutes, then serve warm or transfer to a wire rack to cool completely.

Wednesday, February 17, 2010

Cauliflower and Potato Curry


This recipe is one of my husband's favorite foods, which surprised me at first since he tends to be a bigger fan of traditional "American" fare, like casseroles, as opposed to ethnic food (although he likes that too). I picked up some cauliflower on sale last week and decided to make this since we haven't had it in quite some time. This recipe makes a ton of food and will provide at least a couple of lunches and a couple of dinners for the both of us. It's a great dish to make if you're having a lot of people over. And, although I didn't realize it at the time because I'm not remotely religious, this is a good dish for Ash Wednesday and Lent because it is vegetarian (and vegan too, if you use vegetable oil).

Cauliflower and Potato Curry
from The Joy of Cooking

1 cauliflower, 2 to 3 lbs, cut into florets
2 medium boiling potatoes, peeled and cut into 1/2-inch cubes
1 large tart apple, peeled, cored, and diced
3 large garlic cloves
One 2-inch piece fresh ginger, peeled and sliced
2 hot chile peppers, such as jalapeno or serrano, seeded and sliced (optional)
1/4 c. vegetable oil, clarified butter, or ghee
2 medium onions, coarsely chopped
2 T. curry powder
1 T. all-purpose flour
One 14-ounce can unsweetened coconut milk
1/2 c. water or vegetable or chicken stock or broth
1 t. salt
One 16-ounce can chickpeas, rinsed and drained
10 to 12 ounces spinach, stemmed, washed, and torn into pieces OR one 10-ounce package frozen peas
Salt
Black pepper
Cooked rice
Golden raisins (optional)
Chopped cashews (optional)

1. Cook the cauliflower for 5 minutes in a saucepan of boiling water. Remove from the water with a slotted spoon and transfer to a bowl. Add cubed potatoes to boiling water and cook for 5 minutes. Drain, rinse under cold water, and drain well again; transfer to the bowl of cauliflower.

2. Process apple, garlic, ginger, and chile peppers in a food processor until minced but not pureed. Set aside.

3. Heat vegetable oil in a Dutch oven over medium heat. Add onions and apple mixture and cook, stirring, until the onions are softened and starting to color, 5 to 7 minutes. Add curry powder and flour and cook, stirring, for 3 to 5 minutes to lightly brown the curry powder and flour.

4. Add coconut milk, water, and salt. Bring to a boil over high heat, stirring, then add the reserved cauliflower and potatoes and chickpeas. Reduce the heat to medium, cover, and cook for 15 minutes. Stir in spinach, cover, and cook until wilted, about 3 minutes.


5. Season with salt and pepper to taste. Serve over cooked rice and garnish with golden raisins and chopped cashews, if desired.

Saturday, February 13, 2010

Easy Almond Pound Cake


Pound cake originally got it's name because it was traditionally made with one pound each of butter, sugar, eggs, and flour, although that quantity of ingredients is rarely used today. If you use a 1:1:1:1 mixture of butter, sugar, eggs, and flour the resulting cake will be very similar to the traditional cake.

I used a blender instead of a food processor and sliced instead of slivered almonds. Keep an eye on your pound cake to make sure it's not getting too brown. When I checked on mine after 25 minutes to rotate the pan, it was already a bit darker than I would like so I covered it with aluminum foil for the remainder of the cooking time. To make plain pound cake, omit the almond extract and slivered almonds.

This cake is moist and delicious with a wonderful, but not overpowering, almond flavor. I will definitely make this again. 

Easy Almond Pound Cake
from the America's Test Kitchen Family Baking Book

makes one 8-inch loaf

1 1/2 c. (6 oz.) cake flour
1 T. baking powder
1/2 t. salt
1 1/4 c. (8 3/4 oz.) sugar
4 large eggs, room temperature
1 1/2 t. vanilla extract
16 T. (2 sticks) unsalted butter, melted and hot
1 t. almond extract
1/4 c. plus 2 T. slivered almonds

1. Adjust an oven rack to the middle position and heat the oven to 350 degrees F. Grease and flour an 8 1/2 by 4 1/2-inch loaf pan. Whisk the flour, baking powder, and salt together in a medium bowl.
 2. Process the sugar, eggs, vanilla, almond extract, and 1/4 c. slivered almonds in a food processor (or blender) until combined, about 10 seconds. With the machine running, pour in the hot melted butter through the feed tube in a steady stream until combined, about 30 seconds. Pour the mixture into a large bowl.
 
 
 3. Sift one-third of the flour mixture over the egg mixture and whisk to combine until just a few streaks of flour remain. Repeat twice more with the remaining flour mixture, then continue to whisk the batter gently until most lumps are gone (do not overmix).
 4. Scrape the batter into the prepared pan and smooth the top. Wipe and drops of batter off the sides of the pan and gently tap the pan on the counter to settle the batter. Sprinkle 2 tablespoons of slivered almonds over the cake. Bake the cake until a wooden skewer inserted in the center comes out with a few moist crumbs attached, 50 to 60 minutes, rotating the pan halfway through baking.
5. Let the cake cool in the pan for 10 minutes. Run a small knife around the edge of the cake to loosen, then flip it out onto a wire rack. Turn the cake right side up and let it cool completely, about 2 hours, before serving.

Thursday, February 11, 2010

Baked Beans with Bacon


We had some brats in the freezer that needed to be used up and the natural accompaniment to brats, at least in my opinion, is baked beans. Usually I'll just pick up a can, but I decided to make my own for this time. Many of the commercial ones are sweetened with high fructose corn syrup, which I like to avoid, and are often too sweet for my taste. I also just like knowing exactly what is in the things I eat, all the more reason to make it myself. I went to my number one resource, The Joy of Cooking, for a recipe. There were two different recipes, one that involved soaking dried beans and baking them for four and a half hours, and one that involved canned beans and only an hour of baking time. I opted for the latter. Plus, it had bacon! You can't go wrong with bacon.

Pretty much all commercial baked beans are made with white beans. I used Great Northern beans, but navy beans or cannellini beans would probably also work well (especially the navy beans). I used two 15.5-ounce cans of beans because the store didn't have any 28 oz. cans. The recipe doesn't call for you to drain the beans, but next time I think I'll drain and rinse the beans, adding back the amount of liquid I want since the sauce came out a bit thinner than I'd like and maybe bake uncovered for a bit longer. I also think chopped green peppers and maybe even a little bit of jalapeno pepper would be good additions. I also only used 4 pieces of bacon because I had large, center-cut slices and used an 8x8-inch instead of a 9x9-inch pan. Although the recipe doesn't specifically call for it, I cut the bacon into bite-size pieces.

Baked Beans with Bacon
from The Joy of Cooking

3 c. canned beans (one 28-ounce can)
1/4 c. ketchup or chili sauce
1/4 c. minced onion
2 T. molasses
2 T. brown sugar
1 T. cider vinegar (optional)
3 drops hot pepper sauce or 1 T. prepared mustard (optional)
2 T. bacon drippings (optional)
6 slices bacon

1. Preheat the oven to 350 degrees. Place beans in a greased 9x9-inch baking dish. Add ketchup, onion, molasses, brown sugar, cider vinegar, hot pepper sauce, and bacon drippings; stir lightly to combine. Cover the top with sliced bacon.


2. Bake, covered, about 30 minutes. Uncover and bake about 30 minutes more.

Wednesday, February 10, 2010

Tuna Panini


I found this recipe in the January/February issue of Cooking Light. I try to eat tuna at least once a week because I don't like most fish (though I'm working on trying fish again), but that usually amounts to a tuna salad sandwich or tuna casserole. Both are good, but not terribly interesting. This recipe is essentially a jazzed-up version of a tuna melt.

Tuna Panini
adapted from Cooking Light

makes 4 sandwiches

3 T. finely chopped red onion
3 T. mayonnaise (I used Light Miracle Whip)
1 t. grated lemon rind
1/4 t. freshly ground black pepper
3 slices center-cut bacon, cooked and crumbled
2 (5-ounce) cans albacore tuna in water, drained and flaked
8 slices bread (sourdough is a good choice if you have it, but wheat sandwich bread is good too)
4 (1/2-ounce) slices provolone cheese
Cooking spray

1. Combine the first six ingredients in a medium bowl, stirring well to coat. Place four bread slices; top each bread slice with 1 cheese slice. Divide tuna mixture evenly among bread slices; top each serving with 1 remaining bread slice.

2. Heat a large skillet over medium heat. Lightly coat sandwiches with cooking spray. Cook 3 minutes on each side or until lightly browned.

Monday, February 8, 2010

Corn Bread Tamale Pie


I had some thawed ground beef and was looking for something more imaginative than spaghetti (not that I don't like spaghetti), but still quick and easy for dinner. I also had a craving for corn bread all weekend and this recipe is the perfect solution. Ground turkey is also good in this dish. Although it's good as is, salsa, sour cream, and shredded cheese make excellent toppings.

Corn Bread Tamale Pie
from The Joy of Cooking

makes 6 servings

1 lb. ground beef
1 medium onion, chopped
1 c. canned black beans, rinsed and drained
1 c. drained canned or frozen corn
1 c. tomato sauce
1 c. water or beef or chicken broth
1/2 c. diced green bell pepper (optional)
1 T. chili powder
1/2 t. ground cumin
1 t. salt
1/4 t. black pepper
3/4 c. cornmeal
1 T. all-purpose flour
1 T. sugar
1.5 t. baking powder
1/2 t. salt
1 egg
1/3 c. milk
1 T. vegetable oil

1. Saute ground beef and chopped onion in a large skillet over medium-high heat until the meat is browned and the onion translucent, about 10 minutes.

2. Add black beans, corn, tomato sauce, water or broth, pepper, chili powder, cumin, salt, and black pepper. Simmer 15 minutes; set aside. Preheat the oven to 425 degrees F.
 

3. Whisk cornmeal, flour, sugar, baking powder, and salt together in a medium bowl. In a small bowl, whisk together egg, milk, and vegetable oil. Pour the wet ingredients over the dry and whisk together until well combined. Spread the meat mixture in a greased 3-quart casserole and cover with the corn bread topping. The topping will disappear into the meat mixture but will rise during baking and form a layer of corn bread. Bake until corn bread is brown, 20 to 25 minutes.
 

Wednesday, February 3, 2010

Barbecued Pork Chops


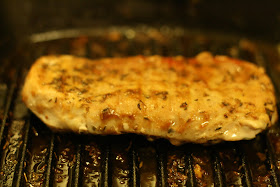
I'm working on using up the meat in the freezer and was just looking for a quick and easy recipe to use up some pork chops. Although the recipe calls for bone-in, all I had was boneless pork chops and they were a bit thinner that 1/2-inch, which cooked pretty quickly in my cast-iron grill pan. I just kept an eye on the chops and cooked them to 160 degrees F.

Barbecued Pork Chops
from the Complete Cooking Light Cookbook

1/4 c. packed brown sugar
1/4 c. ketchup
1 T. Worcestershire sauce
1 T. low-sodium soy sauce

6 (6-ounce) bone-in center-cut pork chops, about 1/2-inch thick
1 t. dried thyme
1 t. garlic salt
1/4 t. ground red pepper
Cooking spray

1. Prepare grill or broiler.

2. To prepare sauce, combine the first four ingredients in a small bowl. Place 1/4 c. sauce in a small bowl and set aside.

3. Trim fat from pork. Combine thyme, garlic salt, and pepper; sprinkle over pork. Place pork or grill rack or broiler pan coated with cooking spray; cook 6 minutes on each side, basting with remaining sauce. Serve pork chops with reserved 1/4 cup sauce.

Chocolate Stack Loaf


This cake is chocolate overload. In general I prefer vanilla over chocolate, but I saw this recipe in the current issue of Better Homes and Gardens (yes, I have a subscription) and it looked pretty good, and would help me use up some whipping cream leftover from making ice cream that was going to go bad soon.

My frosting wasn't quite to spreading consistency after being in the fridge for 1 hour, so I put in the freezer for a few minutes to cool down further. It doesn't ever get as thick as say, buttercream frosting, but cooling it further made it easier to spread. If I make this again, I'll probably cut the frosting recipe in half-there's just too much of it. I also opted to frost the top (because of the amount of frosting), whereas the recipe says to only frost in between the layers.


Chocolate Stack Loaf
from Better Homes and Gardens magazine, February 2010

1 c. unbleached all-purpose flour 
1 c. packed brown sugar 
1/3 c. natural unsweetened cocoa powder 
1/2 t. baking soda 
1/4 t. salt 
1/2 c. unsalted butter, melted 
2 eggs 
1/2 t. vanilla extract 
1/2 c. hot tap water 
1  recipe Easy Fudge Frosting, recipe below
Natural unsweetened cocoa powder

1. Position rack in lower third of oven. Preheat oven to 350 degrees F. Lightly grease sides of 13x9x2-inch baking pan. Line bottom of pan with parchment paper; set aside.

2. In large mixing bowl whisk together flour, brown sugar, 1/3 cup cocoa powder, baking soda, and salt. Add butter, eggs, and vanilla. Whisk gently until dry ingredients are moistened and mixture resembles a thick paste. Whisk briskly about 30 strokes. Tap or shake any batter from whisk. Use rubber spatula to stir in hot water, scraping sides as necessary, just until batter is blended and smooth. With spatula scrape batter from bowl into prepared pan and spread to make a thin even layer.
 
 
3. Bake 14 to 16 minutes or until a wooden pick inserted into center comes out clean. Cool in pan on wire rack 10 minutes. Slide a thin metal spatula or knife around cake edges to loosen from pan. Invert cake onto rack. Remove paper liner; carefully turn cake right side up. Cool completely.

4. Cut cake crosswise in three equal rectangles. Thickly spread frosting on one piece, top with a second piece and spread with frosting. Leave top unfrosted. Thickly frost long sides. Before serving, dust top with cocoa powder. Makes 12 servings.


Easy Fudge Frosting: In medium saucepan melt 6 Tbsp. unsalted butter. Stir in 1 cup sugar, 1 cup natural unsweetened cocoa powder, and a pinch of salt. Gradually stir in 1 cup whipping cream. Heat, stirring constantly, until smooth and hot but not boiling. Remove from heat; stir in 1 tsp. pure vanilla extract. Set aside; cool until thickened and spreadable. To cool quickly, loosely cover and refrigerate 1 hour. Store up to 1 week in refrigerator. Makes 2 cups.